Related Posts Widget for Blogs by LinkWithin

Monday, November 10, 2008

Solstice Calendar: A Work-in-Progress
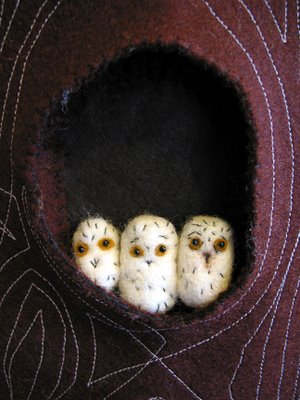
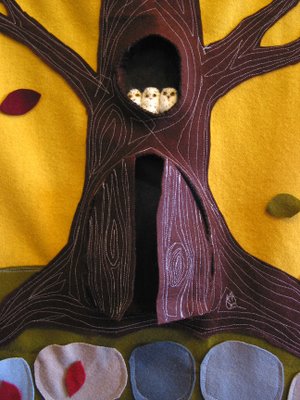
Bill, Sarah, and Percy are the Owl Babies waiting for their mama owl to come home.
Wet-felted, undyed roving with thread, felt, and seed bead details.

For about a year I've been thinking about making a woodland "advent" calendar. I've been wanting to jump into needle-felting and wet-felting — both techniques I have little experience with — and this seemed like a great way to start. I've been envisioning woodland creatures, mushrooms, maybe a few gnomes, tucked away in little "stone" pockets to be pulled out by tiny fingers to attach to their forest home.

Until now my ideas have been fairly abstract — I've known the essence of what I want, but not sure how it would manifest. Last Sunday, on a floor filled with felt and a pair of sharp scissors, I started the process of bringing my idea to life. I'm not sure how long it will take, what the finished piece will look like, or, how it will end up being used. But, I do know that I'd love y'all to follow along. Here we go:

Day 1 (Sunday, Nov. 9th)
As I sat on the floor cutting out felt, I started thinking a little more about what I wanted and the logistics of it all. How will things stick to the felt? Velcro or not? Will they be too heavy? Too fuzzy? Not strong enough to withstand a toddler? Where do I want things to go? How many pockets should it have? What are we celebrating? What am I counting down to? Do the pockets even need numbers? Solstice came to mind. But, unlike Christmas, it falls on a different day each year — and, there are two Solstices to think about. Hmmm? Do I represent winter with snow even though it doesn't really snow here? Should the tree have leaves? How much of it should be movable?

Since this is a work-in-progress, I don't have all the answers. I'm having fun discovering what this project will be as I'm working on it. It's been a long time since I've done a craft without a pattern or book or directions. It's a familiar process, though — it's how I've done things my whole life. My sister and I always had creative freedom — lots of supplies and nobody telling us how it should or shouldn't be (Thanks, mom!). I didn't realize this was such a large part of my creative make up until I started free-hand cutting into the wool felt with no outline or pattern to follow. The process was so familiar. I figured that if I messed up I could get more felt or make something different, maybe end up with a pink tree instead. It's second nature to me now, this knowing that creative mistakes are not to be feared. If only I could apply this to other areas of my life.
----------

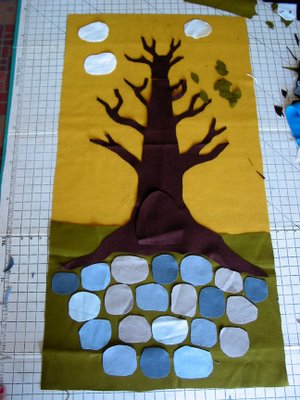
It started to shape up, becoming quite large (about 24 inches by 40 inches). At first I thought it would just be the gold background, but it quickly grew with the addition of the green to make room for the pockets. I prematurely cut the top of the tree, had to move the whole thing down and add a piece at the top. I butt-joined it with the faux wood-grain stitching later on.
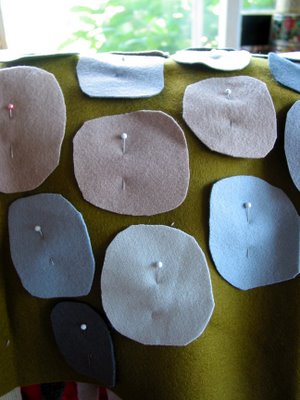
Detail of stone pockets before I sewed them with the opening on the bottoms. Whoops! I still need to seam rip the tops out of three rows. To get as much color variation as possible I used 100% wool, wool/nylon and some wool/rayon blends. I'm not against using acrylic, but trying to keep it to as much wool as possible so I can needle felt on it if I want.
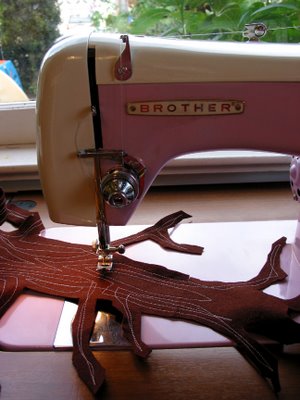
Machine stitching a faux woodgrain pattern on the tree with my new-to-me, vintage Brother sewing machine. I tried make stitching that is visually interesting. My goal is to have a nice balance of shapes, not realism.
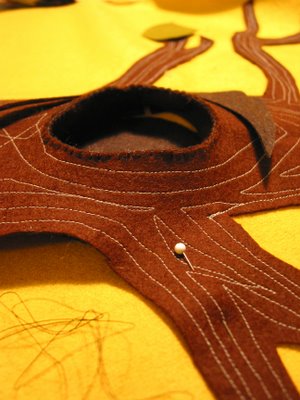
As soon as I cut the hole for the owls to live in, I knew it needed to have some dimension. I added a flange piece by blanket stitching it to the front, then whip stitching it to the background, making sure to go through three layers to tack it all down: the flange, the dark interior, and the golden back piece.
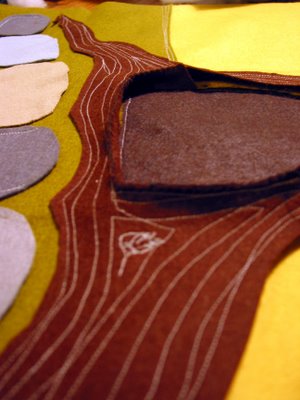
The front doors need to lead somewhere, so another flange is added. That glob of stitching in the foreground is supposed to be a little critter sitting on the tree.
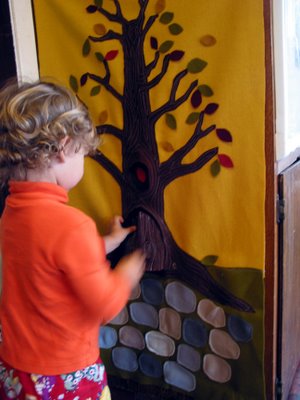
The doors are whip-stitched on the front side and hinged on the inside.

Each child plays differently with it. Little guy, C, likes to rearrange the leaves, big brother, H, likes to take the leaves and put them in the pockets. He also threw them on the ground since it is Fall. "Get it?" he said.
Labels: , , , , , ,

Wednesday, October 01, 2008

Sweater Sleeve Kid Pants Tutorial

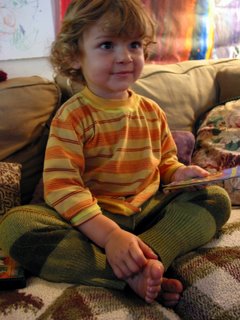
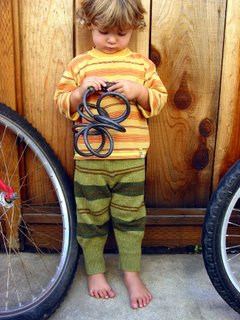
This is not fine sewing — you'll want to skip this post if your inner perfectionist screams at the idea of "winging it." This is a fun and funky tutorial to help you make a pair of kids pants out of the sleeves of a wool sweater. I used a pair of 18-mos-sized sweatpants as a pattern, and adjusted for length to fit my tall 2-1/2-year-old. The sweater I used is at least an adult XL with long, raglan sleeves. To see the other pants that I made with sweater sleeves, see my original post here.

What you will need:
  • A 100% wool sweater, adult-size (Large, XL or beyond)

  • A pair of kid pants that have a rise that fits the child recipient (you can add length if you have enough sweater)

  • Enough 1/2-inch elastic to wrap around the child's waist, plus a little extra (you could use other elastic widths, just make sure to adjust the waistband accordingly)

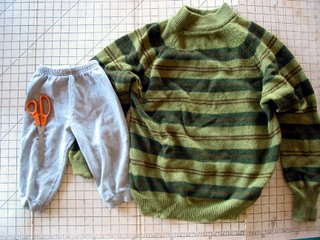
Step 1: Gather your materials
Start with a Large or XL, 100% wool, adult-sized sweater. The bigger the better, because you never know how much it will shrink when you "felt" it.

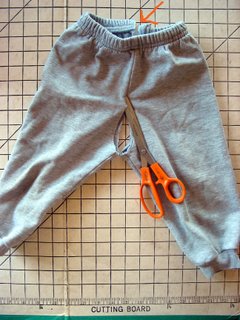
Step 2: Cut out your pattern
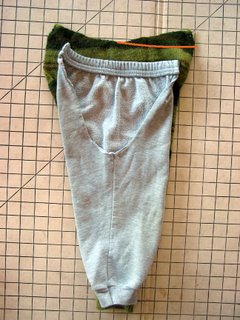
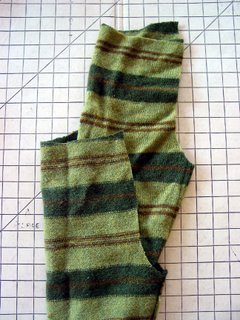
Cut along the inseam of the pants that will become the pattern. This photo looks like I cut through both layers together, but I didn't. If you look at the back of the pants, you can see I started on the other side and worked my way around. I used size 18 mos. sweatpants, because I knew that the inseam fits my two-and-a-half-year-old, and that I could add length.

Step 3: Get your fabric ready
Wash and dry the wool sweater to "felt" it. Cut the sleeves off sweater at the seams. I washed and dried this wool sweater in hot water with soap a few times before deciding to cut into it. I could have "felted" it more, but I figure it's fine as is.

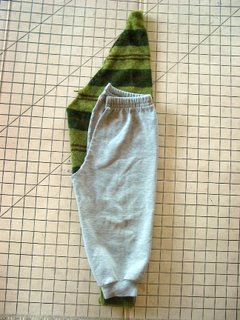
Step 4: Layout your pattern (part 1)
With inseam and sleeve seam on the same side, lay the "pattern" over the "fabric."

Step 5: Layout your pattern (part 2)
Make sure the you have enough width at the top by stretching out the elastic. Move the pattern up or down till you get enough width for the waist (plus a small seam allowance) as well as the right length at the bottom.

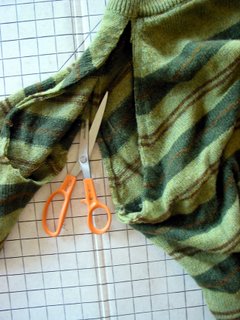
Step 6: Cut inseam
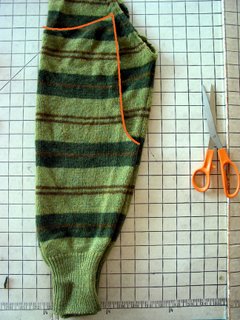
Following the curve of the sweat pants inseam, cut the sweater to match. On these sweats, the inseam has the same curve for the front and back. The only difference is the rise is shorter in the front, longer in the back.

Step 7: Rough cut the waist
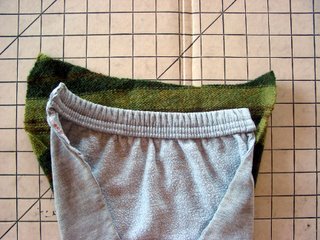
Follow the curve of the highest part of the waist (the back) and leave an extra inch or so for turning to make the casing for the elastic.

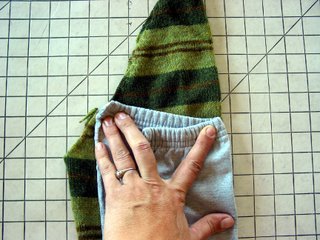
Step 8: Trim the front rise (part 1)
With inseams up, place the pant leg on top of the sweater in preparation for trimming the waist. See how the rise is lower in the front.

Step 9: Trim the front rise (part 2)
Leaving about an inch allowance for the casing for the elastic, and following the curve of the waist, trim off the excess waist in the front of the pants (see orange line in step 8).

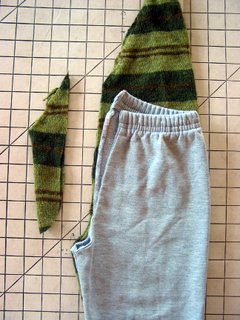
Step 10: Rough cut second leg
With inseams on the same side, lay the first leg/sleeve on the second sleeve to use as a pattern. Cut rise and waist.

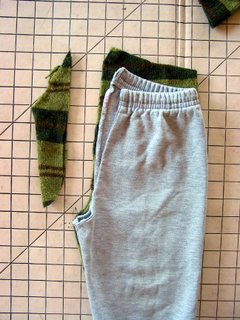
Step 11: Trim waist/front rise of second leg
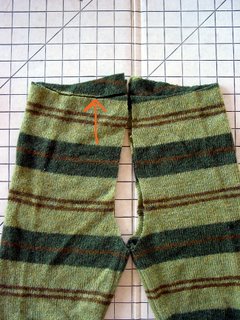
Make sure that you flip the second leg over, so that inseams are where they should be — on the inside. You are making mirror copies of the legs, a right and a left leg. You don't want two of the same leg. Match up the crotch and the waists, then trim the front waist/rise of the second leg. I ended up trimming a bit of the back because it curved up to a point. You want it to be fairly straight across the back.

Step 12: Prepare for sewing
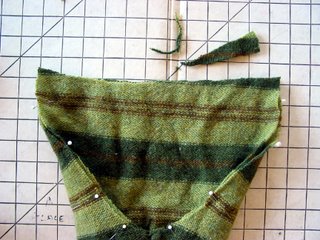
Turn one leg wrong-side out, then insert the other leg so that the right-sides are together and the inseams match up.

Step 13: Pin together
With inseams (and stripes if you have them) matched up, pin legs together. Make sure the waist and rise match. One of my legs had some excess at the back rise, so I trimmed it off.

Step 14: Sew inseam
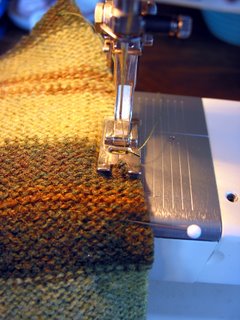
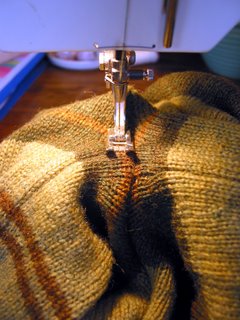
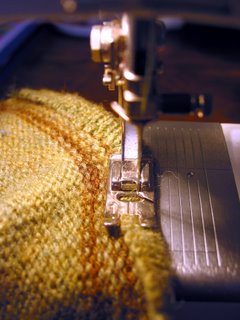
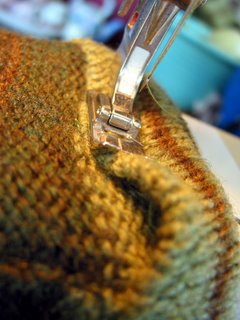
With a zigzag stitch, sew along inseam, removing pins before you get to them. Sew inseam twice. To get the knit fabric to go through my machine smoothly, I pulled a little on the back of it as I was sewing.

Step 15: Top-stitch inseam (optional)
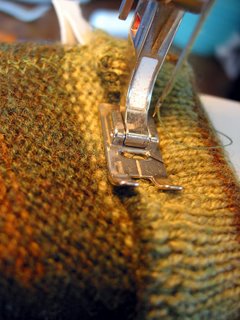
On the right-side top-stitch next to the inseam to help the seam lie flat on the inside. You can skip this step.

Step 16: Turn waist edge (optional)
Turn the top edge of the waist to the inside, about a quarter of an inch, and sew down with a zigzag stitch. Alternately, you could just run a zigzag around the top edge without turning in down. This might be a better option, since the turning adds bulk around the waist.

Step 17: Make casing
After finishing the edge of the waist, fold over the waist about an inch and pin. Starting at the back of the pants, sew a zigzag stitch around the pants waist, stopping a couple inches before completing the circle. You need to leave an opening to run the elastic though.

Step 18: Add the elastic
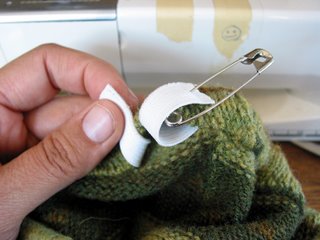
Attach a safety pin to the end of the elastic and run it through the casing, making sure to not twist it. Keep holding the other end of the elastic so you don't lose it inside the casing. Safety pin the elastic ends together and try pants on the recipient. I skipped this step and the next, and had to undo a bunch of stitches to make adjustments to the elastic.

Step 19: Sew the elastic together
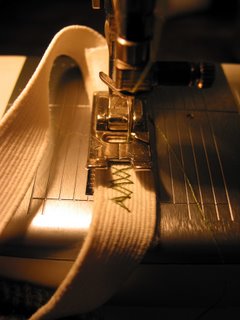
After the elastic is properly sized, pull it through the opening in the casing and run some zigzag stitches along it to close the loop.

Step 20: Close the casing
After making sure the elastic fits properly, sew up the remaining casing. You're done!

Step 21: Bribe child to take photo
Let child watch video so you can take a no-flash photo that's less blurry. Ignore slightly wonky inseam, and enjoy!

Step 22: Bike ride
Make up for video watching with bike ride and outdoor photo shoot. Much better.

Larger photos can be found over at the flickr set.

------------

Trivia tidbit: My photo of the original recycled sweater pants appears in wee form in the book Knitalong by Larissa Brown and Martin John Brown.

Labels: , , , ,

Tuesday, December 18, 2007

The Wiz

wizard hat and wand
In the few minutes I had before leaving for our little friend's birthday party (we were already 45 minutes late!) I couldn't get a photo that showed off how cool this wizard's wand project is. It was *super* fun to make. And, I hear it was a success with the birthday girl witch, too. Best quote at the party was an excited squeal, "That's just like Hermione Granger's wand!"

Labels: , ,

Wednesday, September 26, 2007

Gatsby Picnic

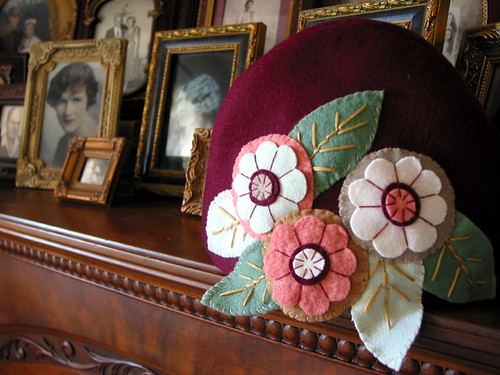
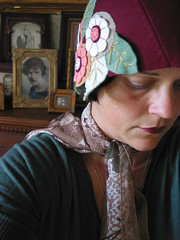
Wool Felt Cloche
Wool Felt Cloche 2
At my mother-in-law's request our family attended the Gatsby Picnic a couple weeks back. It was motivating, if nothing else. Where does a 185 lb, 5 ft. 9.5 in. girl get herself some authentic 1920s or 30s vintage outfits in a hurry? She doesn't. She has to make them.

I started by buying some patterns from Decades of Style because they have redrafted some great vintage patterns to fit larger sizes (Angelina are you listening?). I made this skirt and this jacket (still a WIP). My sister found a vintage-looking Target sweater at a garage sale. I just happen to have some vintage size 11 shoes that worked. My goal was to look appropriate, but not too fancy.

After looking at the Vintage Pattern Lending Library I was dying to make one of these wonderful felt hats. Of course, I picked the one with the flowers. I used all materials from the stash — a benefit of being a hoarder. The picnic day turned out to be very warm, so I traded in the wool for a straw cloche that my MIL had. The wool hat made its debut at preschool last week when my hair was in a state that might scare small children. Turns out the hat scared them more than the hair. Go figure.

More photos from the picnic here.

Labels: , , ,

Monday, July 16, 2007

Hanging With My Gnomies

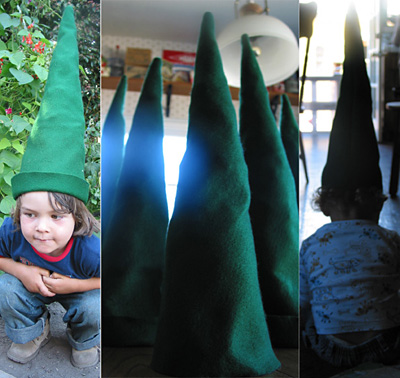
gnome_hats
I stole that pun from Angharad. This is the easiest craft of all time. I used what I had (old, musty acrylic felt yardage), measured my son's head, and cut out a rough triangle — a quick stitch on the machine and we had a gnome hat, as requested, in green. Who knew that the whole family would want them?

Labels: , , ,

Sunday, April 15, 2007

100 Posts 39 Years


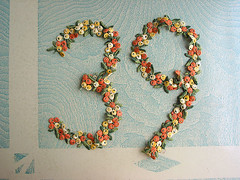
39
Originally uploaded by Green Kitchen.
NOTE: I call it "mama brain," my husband called it "pulling a lame-o." Did you notice that I never really told you what I was giving away? My grand idea is make another pincushion with chick and flower pins. Sound good? I hope this works for you all. Because of my mess up I'm going to extend the sign up until midnight tonight, Flickr comments included.

Thanks for all the birthday wishes! I had a great day.


------------------

Well, it's about time for a give-away, no? Recently I found this embroidered trim that I thought had disappeared under suspicious circumstances. It turned up at the bottom of my floss basket. Whoops! So glad I didn't make any accusations.

Do you remember what I used it on? Yep, that chicken pincushion for the swap with Samantha. It remains one of my most viewed photos at Flickr, as well as one of the most common ways to find me through Google. Sometimes I wonder if "chicken pincushion" has some subversive meaning. Anyone?

So, leave a comment today, before midnight Pacific Standard Time, and tomorrow I will draw a name for one lucky winner. And, thank you everyone for being part of this thing that I love.

Oh, yeah, it's my birthday today. This is what I hope happens: a shower for my grubby self; finishing sewing the Hawaiian tunic to wear (Sounds like a muumuu, huh? One of the benefits of being 39.); shopping for fabric with the Bitter one; letting my four-year-old surprise me; riding the Giant Dipper; eating sushi; having banana cake with whipped cream, getting lots of hugs and kisses from the littles; no time outs.

P.S. Please make sure to leave a way for me to find you. You know Blogger isn't so good about this. I think you need to type the "www" before your blog address for it to work. If you're not sure, leave an email address. Melissa and Kristy, I'm not sure who you are.

Labels: , , ,

Monday, December 18, 2006

Christmas Stocking Wall


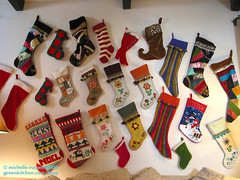
Christmas Stocking Wall
Originally uploaded by Green Kitchen.
Thirty-eight years of Christmas stockings. Can you spot the decades. Almost all are handmade by family or friends. I think there are four store-bought ones. Can you tell which one my four-year-old had to have?

Labels: , ,

Friday, December 08, 2006

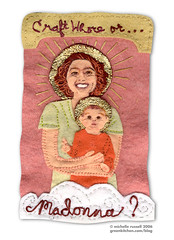
Craft Whore or Madonna?


CRAFTWhore
Originally uploaded by Green Kitchen.
Once upon a time this crazy smart and talented friend of mine thought we should have our own alterna-craft fair — so we did. Her handle (how 70s is that?) was Craft Whore — mine, she determined, was Craft Slut. That didn't seem right for me (I'm much too prudish), so it was quickly changed to Craft Meanie, which is more in line with my Spice name, Grumpy Spice. Anyway, since I can't post any of my holiday crafts I decided to pull this out of the archives. It's Craft Whore's felt portrait that I made for our online craft bios.

I started by taking a photo for reference. When I took the photo she just happened to be holding her baby, who just happened to hold up her hand like baby J. Divine craft inspiration? I think so. At the time I was also having some difficulty coming to terms with the name Craft Whore (remember, I'm a prude). How was I going to present Craft Whore to the world, and in felt no less? But, then, I realized that she could be both, Craft Whore and Craft Madonna — and, that it's quite common to have a complex about this.

I got to use some of my long repressed soft sculpture skills from way back (I won 1st place at the county fair when I was about 12). I used a couple layers of felt for the cheeks (she's cheeky) and trimmed the edges with an Exacto knife for roundness. The halos are vintage German goldleaf glued to felt.

I don't know how to end this post except to ask: Which one are you?

Labels: ,

Friday, August 18, 2006

Christmas in August


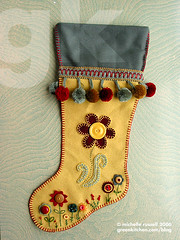
gold
Originally uploaded by Green Kitchen.

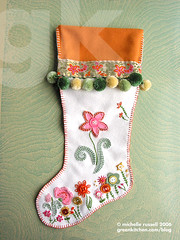
orange
Originally uploaded by Green Kitchen

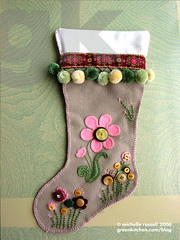
grey
Originally uploaded by Green Kitchen.
I've been saving these stockings to share at a time when everyone is not overwhelmed by the holidays. Hopefully they will inspire a whole mess of embroidery projects. I've had close up details posted at Flickr for some time now. I made seven of these for my family Christmas 2004. Looking back now, I remember that they were the beginning of my new craft era, and part of the catalyst for our wacky idea to put on a craft show.

P.S. Have you all been to Getting Stitched on the Farm? I think I'm in love: the painted wall; the socks for Vogue Knitting; the animals. Sigh...

Labels: , , ,

Sunday, March 12, 2006

Finished Projects--Two Years Later!


needlebook
Originally uploaded by Green Kitchen.
There's something about having this blog that makes me finish projects. In the past, abandoned projects would go unfinished forever haunting me and causing me much guilt. But, now, the new blogging me gets these things done for the satisfaction of posting them, which is somehow more motivating than actually giving the gift. Hmmm? For my sister's bridal shower I had two gifts, a sewing kit and a cookbook, neither was completed until this month. When was she married, you might ask -- nearly two years ago! Thanks for waiting sis.


sewingkit2
Originally uploaded by Green Kitchen.
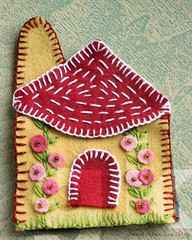
This cottage needlebook, made from a pattern (I can't remember the book) is the final addition to the sewing kit. All of the wonderful needlebooks posted lately (see here, here, and here) gave me the inspiration to get mine done. All I had to do was sew in the pieces of fabric to put the needles in. It took about five minutes to finish. Why did I wait two years! Note: the fabric for the needlebook is a wonderful woven wool/rayon felt, the same as I used for my embroidered stockings. It's a little more rough around the edges than regular wool felt, but it is so soft and drapes beautifully.


inside2
Originally uploaded by Green Kitchen.
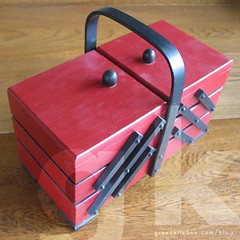
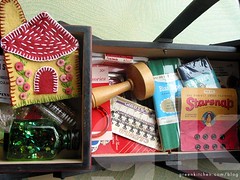
Originally the sewing box was an ugly brown stain. A quick remedy of matte red spray paint with black details made me much happier. I took the whole box apart before painting it to get a cleaner look. Then, I filled the kit with vintage supplies! Hunting for the notions was the funnest part.


Bridal Shower Cookbook
Originally uploaded by Green Kitchen.
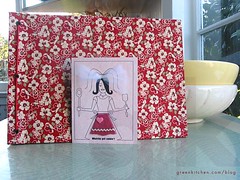
The cookbook was a collective gift that I organized and art directed, and then let lie fallow. It's called "Whatcha Got Cookin'" and everyone brought a favorite recipe and decorated (you could say "scrapbooked," but that word leaves a bad taste in my mouth) a page to add to the book. I can't say it's fine bindery, but I did learn a bit about grommets and glueing fabric to cardboard. The book has been sitting unbound until just recently. The party invitations were also tied into the cooking theme. I drew a caricature of my sis holding a spoon and a spatula and then hand decorating the cards with felt, tulle, and rickrack.

Whew! Two projects done, many more to go. Coming up next in the world of unfinished projects: circus-themed bean bag toss game, vinyl and polyester quilt handbags, vintage fabric appliqued heart quilt.

Labels: , ,

Tuesday, February 28, 2006

Chicken Swap Sneak Peep


Chicken Swap Detail
Originally uploaded by Green Kitchen.
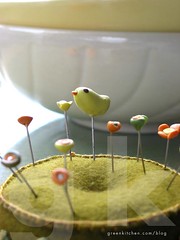
Here's a detail from a chicken swap I'm doing with Plump Pudding. Obviously I'm not very good at keeping secrets, but all is not revealed and I still have a few more surprises to add to the package. I started this project before I read her post about being a fickle-minded pincushion user. Hopefully this one holds her interest for awhile.

Side note: I'm watermarking my photos now because I'm a bit of a paranoid person and I've read a couple stories that got me thinking. And, although I'm not protecting any personal business interests, I do loath thievery. And, if I found one day that someone was using my photos in some non-ethical way, I might seize up and not be able to blog anymore. And, that would be a sad, sad day.

P.S. I forgot to mention that Bella Dia's pincushions and Wee Wonderfuls' Shrinky Dink pins were my inspirations on this one. I didn't have any Shrinky Dink sheets in the house, so I used Fimo. To make it an actual chicken swap I had to make the chick to tie it all together.

Labels: , ,

Tuesday, February 21, 2006

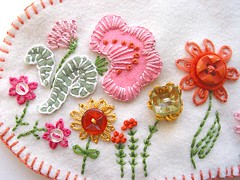
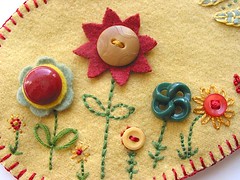
Embroidered Flowers with Vintage Buttons


pink_orange_flower_detail2
Originally uploaded by Green Kitchen.
I'm longing for spring. Not that California weather is anything to complain about, but, still, I miss the flowers and the leaves and the longer days. I've been wanting to post photos of these stockings I made, but just missed the window of opportunity this Christmas because I started this blog in January. Since I can't wait till next December, I'm posting photos of the details, which are more springtime than Christmastime, anyway.

red_gold_flowers2
Originally uploaded by Green Kitchen.

I was inspired by an artist, Linda Solovic, that I found in a Mary Engelbreit magazine (yes, a guilty pleasure of mine). I'm beginning to wonder if I can have any original ideas. I seem to stagnate until I see something someone else has done, then go off and do my interpretation of it. Now, though, as I look back at her work, I can see there is more difference than I thought. I made these a year ago, so it has been awhile since I'd seen Linda's work. The question is: Will I ever pull ahead and create my own ideas/look/style, leaving behind any fears of copycatism?

More detail photos at Flickr.

Labels: , ,