Related Posts Widget for Blogs by LinkWithin

Monday, November 10, 2008

Solstice Calendar: A Work-in-Progress

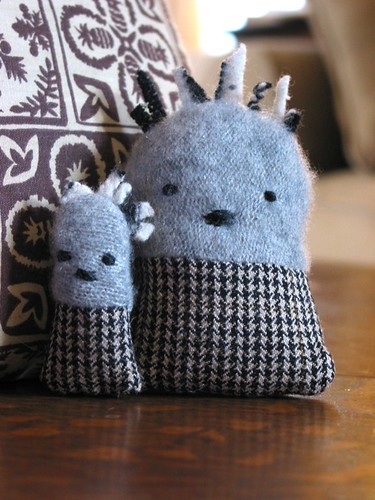
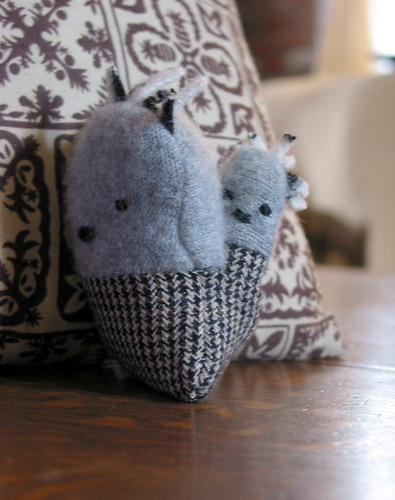
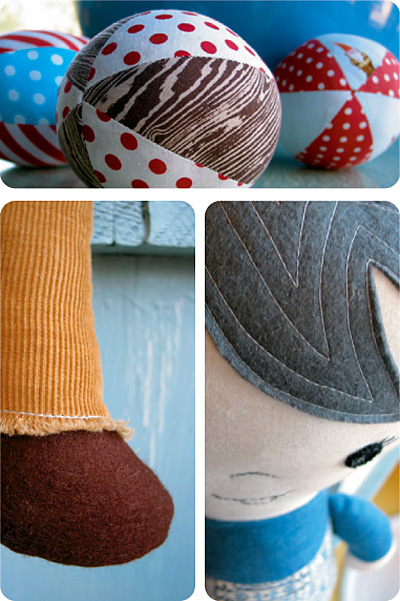
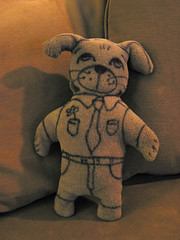
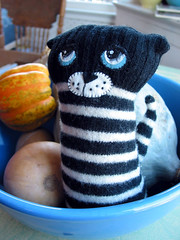
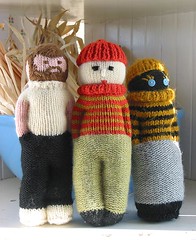
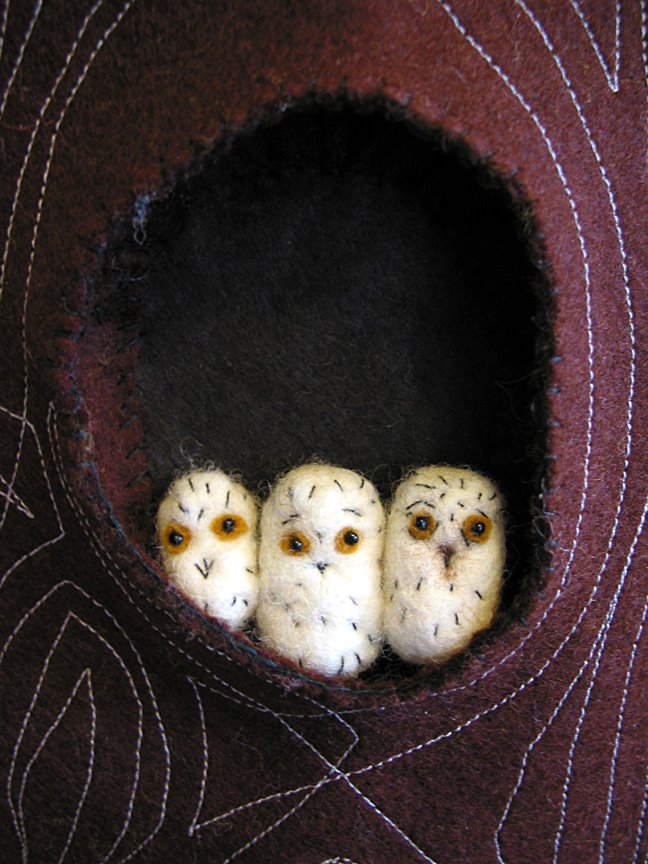
Bill, Sarah, and Percy are the Owl Babies waiting for their mama owl to come home.
Wet-felted, undyed roving with thread, felt, and seed bead details.

For about a year I've been thinking about making a woodland "advent" calendar. I've been wanting to jump into needle-felting and wet-felting — both techniques I have little experience with — and this seemed like a great way to start. I've been envisioning woodland creatures, mushrooms, maybe a few gnomes, tucked away in little "stone" pockets to be pulled out by tiny fingers to attach to their forest home.

Until now my ideas have been fairly abstract — I've known the essence of what I want, but not sure how it would manifest. Last Sunday, on a floor filled with felt and a pair of sharp scissors, I started the process of bringing my idea to life. I'm not sure how long it will take, what the finished piece will look like, or, how it will end up being used. But, I do know that I'd love y'all to follow along. Here we go:

Day 1 (Sunday, Nov. 9th)
As I sat on the floor cutting out felt, I started thinking a little more about what I wanted and the logistics of it all. How will things stick to the felt? Velcro or not? Will they be too heavy? Too fuzzy? Not strong enough to withstand a toddler? Where do I want things to go? How many pockets should it have? What are we celebrating? What am I counting down to? Do the pockets even need numbers? Solstice came to mind. But, unlike Christmas, it falls on a different day each year — and, there are two Solstices to think about. Hmmm? Do I represent winter with snow even though it doesn't really snow here? Should the tree have leaves? How much of it should be movable?

Since this is a work-in-progress, I don't have all the answers. I'm having fun discovering what this project will be as I'm working on it. It's been a long time since I've done a craft without a pattern or book or directions. It's a familiar process, though — it's how I've done things my whole life. My sister and I always had creative freedom — lots of supplies and nobody telling us how it should or shouldn't be (Thanks, mom!). I didn't realize this was such a large part of my creative make up until I started free-hand cutting into the wool felt with no outline or pattern to follow. The process was so familiar. I figured that if I messed up I could get more felt or make something different, maybe end up with a pink tree instead. It's second nature to me now, this knowing that creative mistakes are not to be feared. If only I could apply this to other areas of my life.

----------

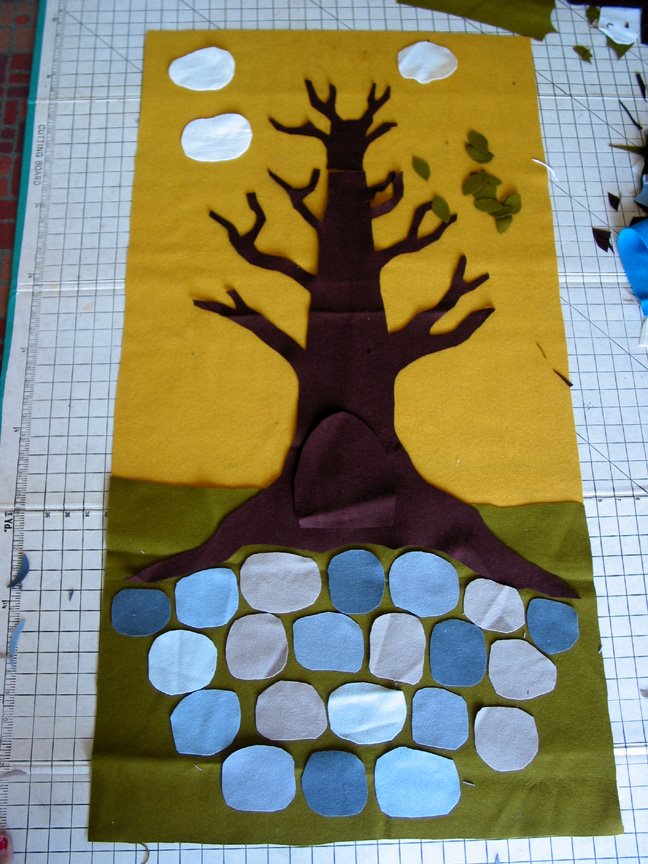
It started to shape up, becoming quite large (about 24 inches by 40 inches). At first I thought it would just be the gold background, but it quickly grew with the addition of the green to make room for the pockets. I prematurely cut the top of the tree, had to move the whole thing down and add a piece at the top. I butt-joined it with the faux wood-grain stitching later on.

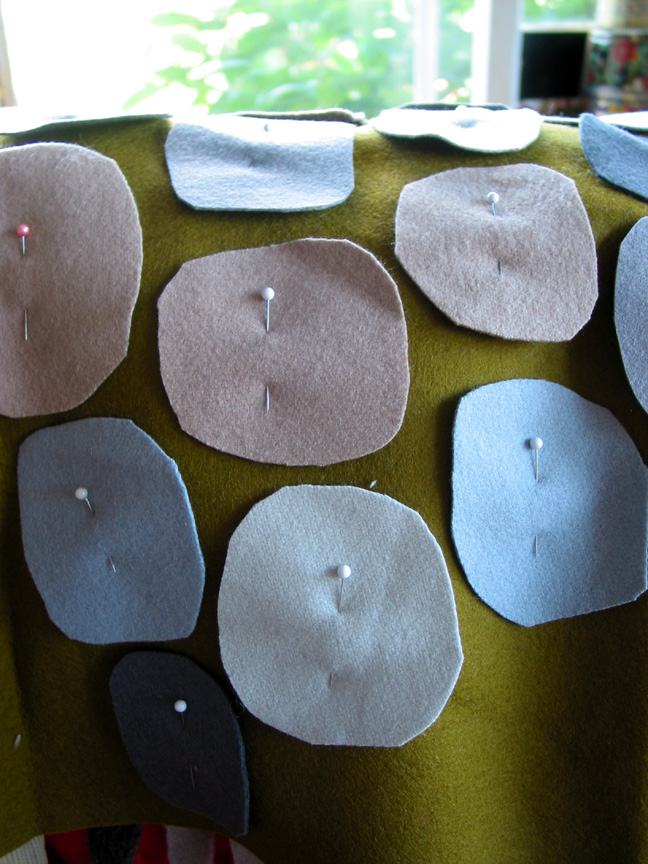
Detail of stone pockets before I sewed them with the opening on the bottoms. Whoops! I still need to seam rip the tops out of three rows. To get as much color variation as possible I used 100% wool, wool/nylon and some wool/rayon blends. I'm not against using acrylic, but trying to keep it to as much wool as possible so I can needle felt on it if I want.

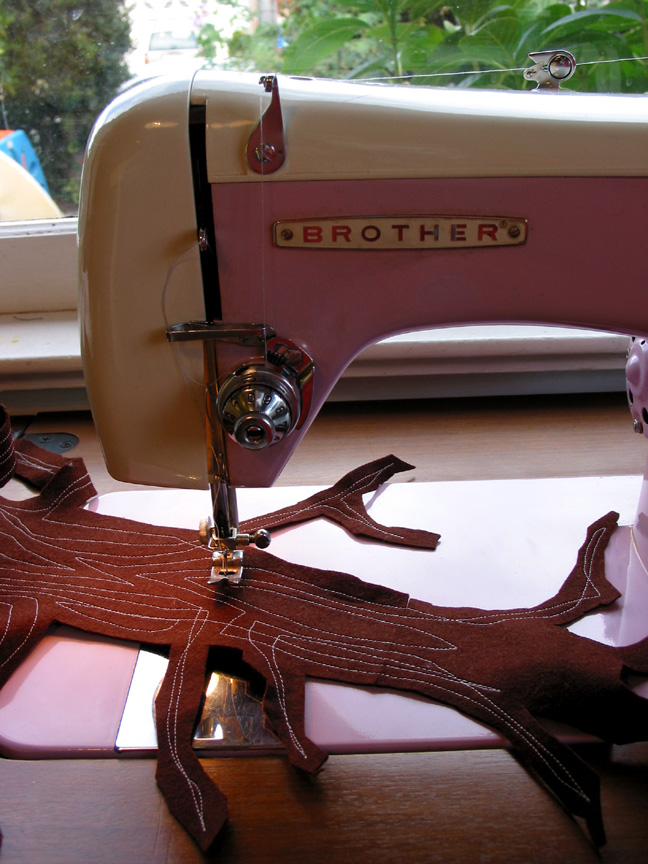
Machine stitching a faux woodgrain pattern on the tree with my new-to-me, vintage Brother sewing machine. I tried make stitching that is visually interesting. My goal is to have a nice balance of shapes, not realism.

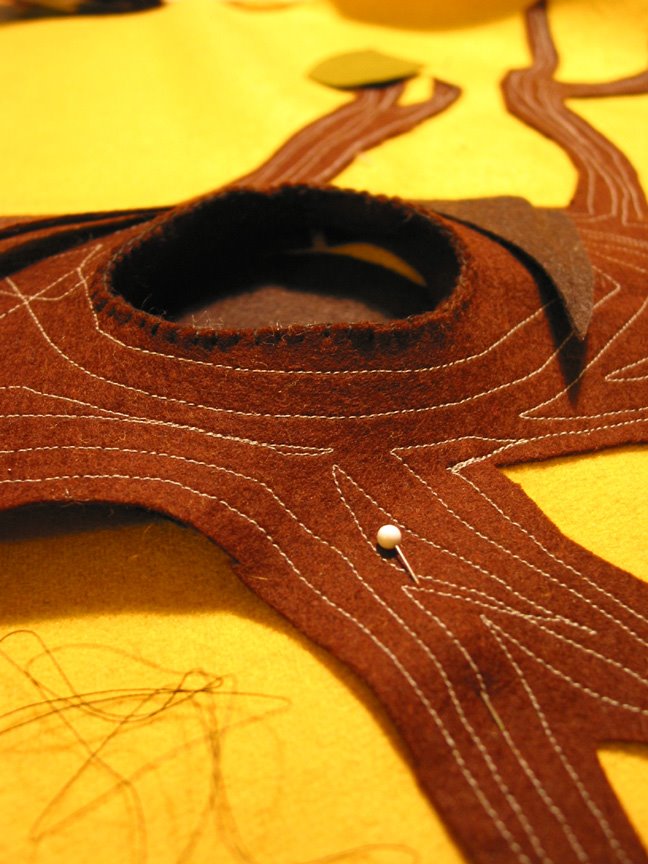
As soon as I cut the hole for the owls to live in, I knew it needed to have some dimension. I added a flange piece by blanket stitching it to the front, then whip stitching it to the background, making sure to go through three layers to tack it all down: the flange, the dark interior, and the golden back piece.

The front doors need to lead somewhere, so another flange is added. That glob of stitching in the foreground is supposed to be a little critter sitting on the tree.

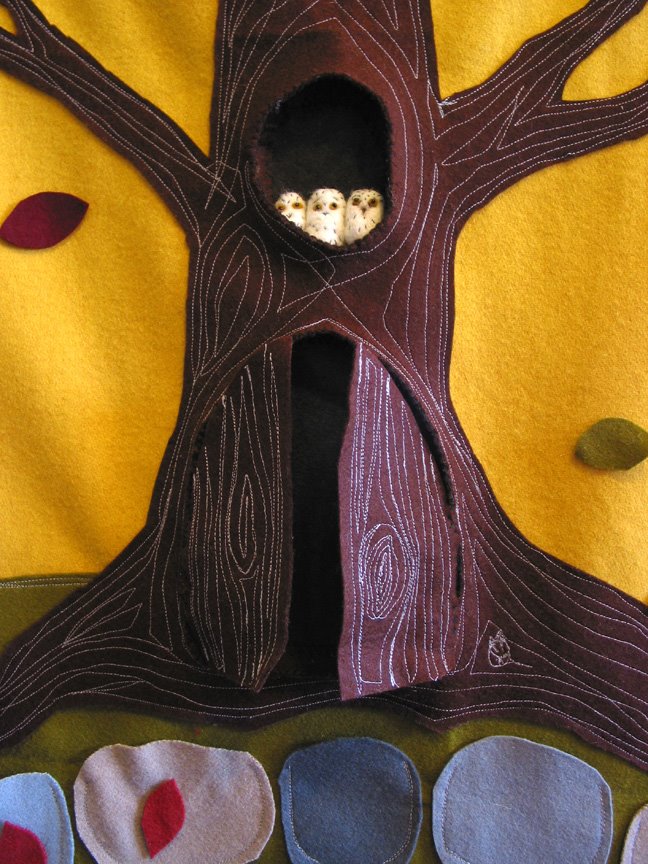
The doors are whip-stitched on the front side and hinged on the inside.

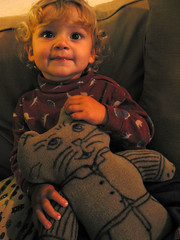
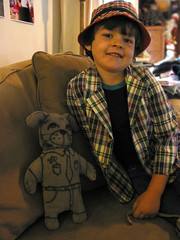
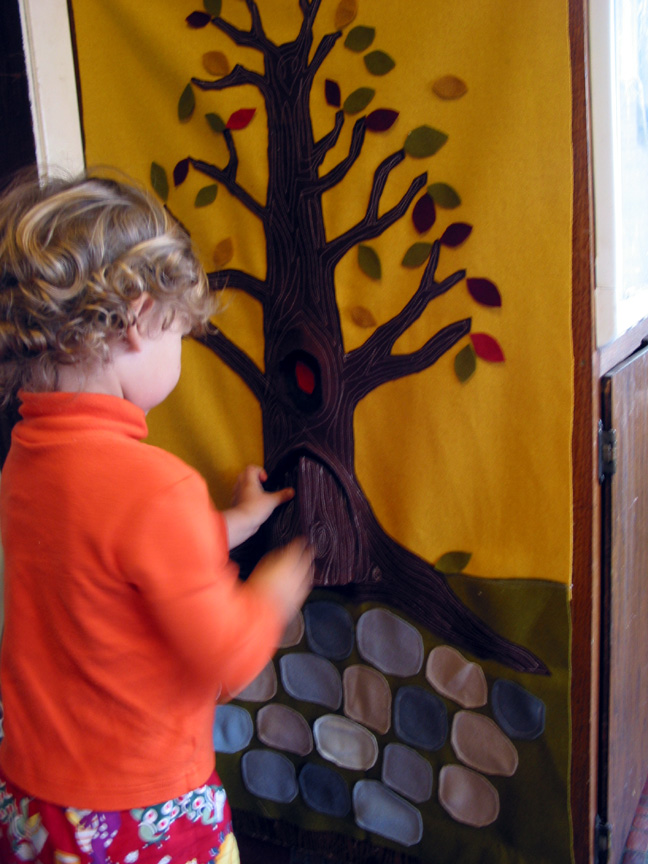
Each child plays differently with it. Little guy, C, likes to rearrange the leaves, big brother, H, likes to take the leaves and put them in the pockets. He also threw them on the ground since it is Fall. "Get it?" he said.

Labels: , , , , , ,

Saturday, September 20, 2008

Hedgies

big_little_hedgie

hedgie_backpack

From Molly Chicken's super cute pattern. Mine are a little wonky because I used the leftover cashmere bits from the sweater apron. Last call on that apron give-away.

Labels: ,

Tuesday, April 08, 2008

Straw Bale House

bales
h_and_c
kid_garden
It's a lot easier to be video free video light in the Springtime — we're giving it another go. Winter was tough. As soon as the kids got sick I caved in and the videos trickled back downstairs until there were huge piles of them. Straw bales help — they might be my favorite kid toy of all time. Lots of creative play has been going on, around, on top, underneath, and inside of them. And, when stacked they are slightly dangerous, which makes them even better. We're thinking of getting some for a friend for his fifth birthday.

Labels: ,

Saturday, February 09, 2008

Soft Toys

Toys for the kids.
Feeling non-verbal non-typal tonight. Fabric balls were for C for Christmas. The Wee Wonderfuls dolls were just finished today. More photos at flickr.

Labels: ,

Wednesday, November 07, 2007

Cat is for C


cat for C
Originally uploaded by Green Kitchen.


c_cat
Originally uploaded by Green Kitchen.


dog for H
Originally uploaded by Green Kitchen.


h_dog
Originally uploaded by Green Kitchen.

This was by far my simplest, most successful craft of all time. These critters are loved with a capital L.

While C was sick with a fever for four nights and five days my job was to carry him around the clock. Oy! My Back! My other job was to try and get those gnome costumes ready. Somehow, on the day before Halloween, C let me put him down just long enough to finish the gnomish garb.

Since I was working with fleece for H's gnome pants I got an idea to make a quick stuffed animal for C. And, since C LOVES cats (he signs "baby" for cats), I decided to stitch one up real quick.

First, I turned the fabric right sides together and drew a cat-like shape. While it was a work-in-progress I drew on some eyes and whiskers on the wrong side to let C know what I was up to. To save time I didn't even use pins. I didn't really care about symmetry or how it was going to look. I knew that as long as it had whiskers he'd be happy. I was planning on embroidering them after stuffing. But, after it was stuffed, he was wondering where the whiskers went. To keep him happy, I drew them on the right side with Sharpie marker. It worked! — even on the fuzzy side of the fabric. So I went ahead and drew the whole critter on. It was really fun and simple.

Then one had to be made for big brother, of course. The dog was not quite as easy because H is a little art director in the making. He wanted it slightly smaller than the cat. After it was stuffed and done he wasn't happy with the ear/face area. I altered it by cutting into the stuffed fleece and hand stitching it closed. Luckily fleece is very forgiving.

We've noticed around here that most of our dolls are either animals or guy dolls, or, now, guy/animal dolls. I'm seriously tempted to try and get one of Mimi's muscle men. We have a thing for the mustachioed set 'round these parts.

Labels: , ,

Monday, April 23, 2007

Boys and Toys


Not much crafting going on around here. I've been cleaning my craft area, which took two whole days — sorted a mess of fabric by color and realized that I could sew for two years straight and not need to buy anything new. Help, someone stop me.

And, we're in the middle of birthday season around here, with five birthdays in about five weeks. These photos were taken by my sister at my dad's birthday party. My dad has been trying for years to find the pedal car of his childhood and he finally got one — handy timing for the grandkids. At the same time he bought one to match his current hotrod. He specializes in '32 Ford roadsters with vintage speed equipment. My sister pointed out that my dad is obsessed with the past, which made me realize our interest in vintage isn't that surprising. The apple doesn't fall from the heritage tree, as it were.

Labels: , ,

Saturday, January 13, 2007

Sad Cat


cat_bowl
Originally uploaded by Green Kitchen.


cat_window
Originally uploaded by Green Kitchen.
A little bit of short-craft to follow up the long-craft baby blanket. Nothing like a project you can finish in an evening or two — sure beats four months, no? Not really better, but it is a refreshing change. Influenced by this, this, and this. I was going to add a cigarette, like this, but decided that I didn't know how I would explain it to my son. He knows that his uncle lost toes to gangrene (green green, as he calls it) complicated by cigarette smoking, so there's a definite say-no-to-smoking thing going on at our house.

P.S. Thank you all for the blogiversary love. :) Here's to another crafty year. And, I'm still going to do a Christmas recap, really.

Labels: ,

Sunday, March 26, 2006

If Camilla and Hilda Had a Bunny Child


Bedfellow Bunny
Originally uploaded by Green Kitchen.
This is what happens when you use what you have at my house. Not a bad thing, just different than I had planned. I've been wanting to buy a Camilla Character for some time now, but never seem to catch them when they hatch (damn no RSS feed haver ;). Since I knew Camilla had a pattern published, I went out and bought Happy Hooker thinking I could make one of her creatures—even after reading Hillary's lament. Originally, I wanted it to be some cool, Swedish-inspired color combo, but what came out of my stash was pure Portugal. Seems I'm more naturally inclined toward Hilda's color palette.


Bedfellow Bunny with Art
Originally uploaded by Green Kitchen.
Now, Hillary, don't feel so bad about not conquering this animal—it was a bit of a beastly bunny. The already large amount of respect I had for Camilla's work has now increased at least twofold. The asking price for her Characters is by far an excellent deal. Remember, it takes her about 10 hours to make one of them—it took me a couple days. Not to mention the materials costs, mine were around $30 (red yarn, Noro = $22; pink yarn, thrifted vintage Aunt Lydia's rayon and cotton rug yarn = $1; green yarn, some mystery cotton = $4; half bag of polyfill = $4).

My biggest challenge was probably my own fault since I didn't use the recommended yarns. And, then, I didn't even use the recommended yarn weights. I reversed them, using the heaviest yarn for the face and paws, and the lightest weight for the pants. I had to improvise the pattern to adjust for the different yarn weights (i.e. reducing the amount of stitches and rows for the paws, and increasing the stitches and rows for the pants). My first attempt at a head taught me the basics: how each body part is started, how to increase, and how to decrease.


I compounded my struggle with yarn weight because I couldn't find all my crochet hooks. I only used an H hook for all the weights of yarn. Things got really tight, my wrist and hand strength were tested and still haven't recovered. To get the hook through each stitch I had to improvise an insertion technique. Instead of pushing the top of the hook through the back of the stitch, I turned the hook around to catch the stitch and then rotated the hook back to normal holding position. A bit of crocheting acrobatics, but it worked.

I'm sure with the correct materials this project would have been a lot easier. I know I tend to be a tight knitter, so I'm probably a tight crocheter as well, and I aggravated my retentive ways by using the wrong materials. Ayurvedically speaking you would understand this as classic Pitta Kapha behavior. I wanted the stitches to be perfect. I had high expectations for quality. But, I was too lazy to get up and find the right materials, which would have made things easier. I made my way through to the end of the project by shear force.

Labels: , ,

Friday, February 10, 2006

Simple Knit Dolls


Simple Knit Dolls
Originally uploaded by Green Kitchen.
Worked on straight needles, these dolls are very easy to make for a beginner. These were some of my first ever knitted projects, right after simple ribbed scarf and straight needle hats. They're really fun to hold--soft, squishy, and somehow different than a fabric doll. I got the pattern for the middle doll out of a toy making book from the early 1980s, which I'll post when I can find the book (must tackle six-foot craft pile to find it). But, really, you can do it without a pattern, which is what I did for the other two dolls. The left doll is supposed to be my husband (Dickies, white t-shirt, Adidas, and a beard--tee hee) and the one on the right is a bee lady (gold and black striped sweater, grey skirt, and removable stinger hat). I crocheted a circle for her base, and small circle shoe soles for my husband's Adidas.

Basically, for the middle doll, you work a rectangle from the feet up to the collar of the sweater, switching colors as you choose for shoes, pants, and sweater. The shoes were knit, pants were pearl, and sweater knit with a k1 p1 rib. Bind off and then pick up stitches to work the face. If I remember correctly, the head has the same amount of stitches as the body, but is shaped at the neck later. I switched yarns to give him hair, which you can't see because it is under his removable hat. As you get toward the top of the head start to decrease at the end and beginning of each row. The rest is just finish work: sew up the back seam, stuff, and hand stitch to shape the neck, arms and legs (this was the hardest part for me, to get the needle through the fill, perhaps wrong needle). The eyes, nose, and mouth are simple embroidery with yarn.

Labels: , , ,

Wednesday, January 18, 2006

Amigurumi with Flowers


Amigurumi with Flowers
Originally uploaded by Green Kitchen.
This is my first attempt at amigurumi. I started it last summer and am happy to have finally finished it--seems this blog gives me a little extra incentive to get things done, which is exactly what I need. For the longest time this gal had no arms or legs because each time I crocheted some they looked like tampons or tampon cozies as it were.

Labels: , , ,