Related Posts Widget for Blogs by LinkWithin

Monday, May 18, 2009

The Everything Post: Sewing, Moving, Wonder Twin Powers & Fabric Porn

Since I can't seem to write a proper post these days I'm just going to put down some random bits. I have been slightly more active over at Twitter if you want to follow me there, too.
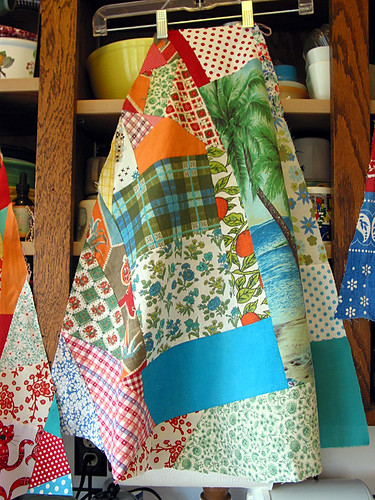
Everything Tote
I sewed the Everything Tote from Heather Ross' Weekend Sewing and I love it! I pack it full of clothes, food, sunscreen, and take everything everywhere. The Joel Dewberry, decor-weight exterior is holding up well, as is the cute, Japanese Bambi twill lining. At Quilt Market Melanie Falick told me that it really helps book sales if people review books at different times, not just when they are released. I'll keep posting as I sew all the cute stuff Heather designed. I did just break my fabric buying freeze to get some of her Far, Far Away before it's all gone. I follow WhipStitch Fabrics on Twitter and couldn't pass up a 15% off code (I think she's out of FFA). Am currently wondering if a 41-year-old woman can pull off a purple unicorn tunic. And from the shameless self-promotion department, did you know my blog is mentioned in the inspirations section of Weekend Sewing? Guess I need to get to work! Wonder Twin powers activate! Shape of an inspiring craft blog!
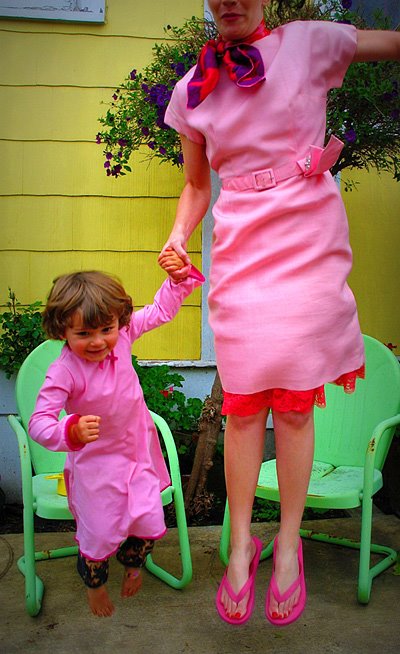
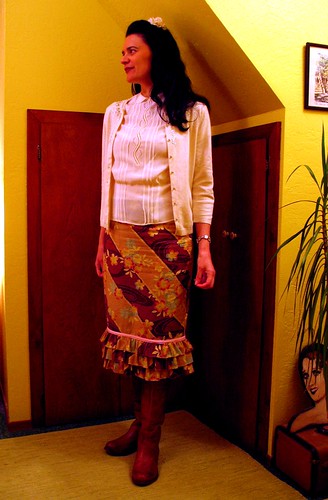
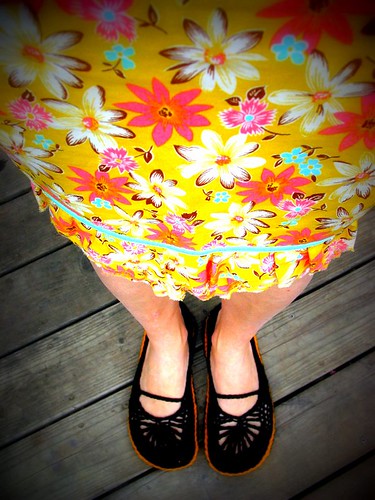
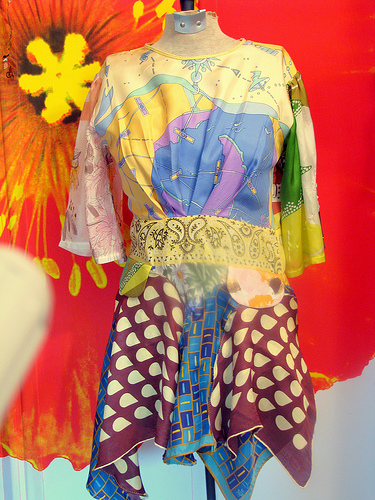
Without a dressform
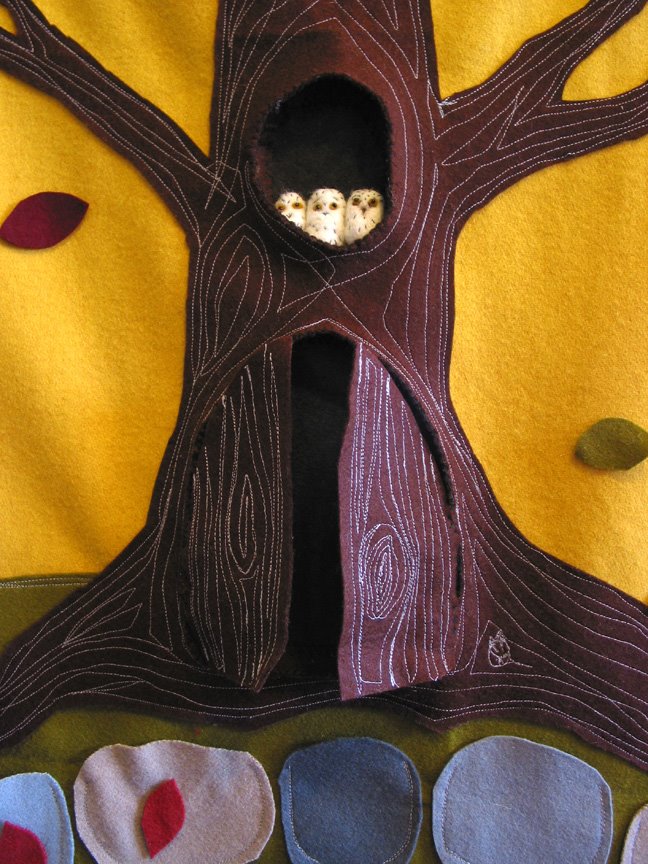
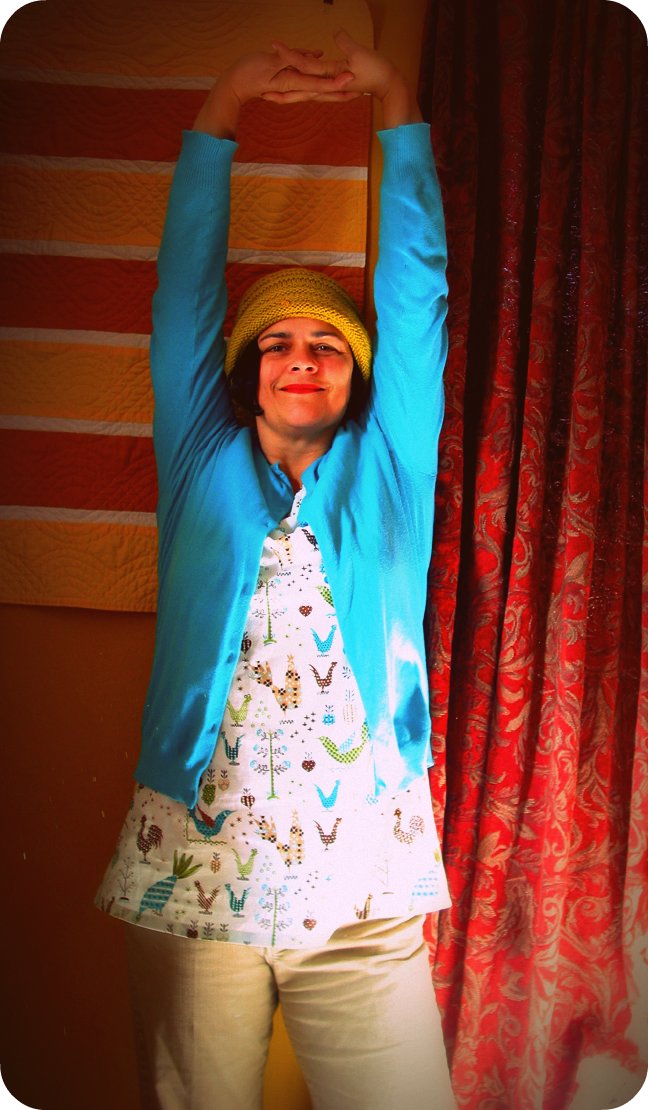
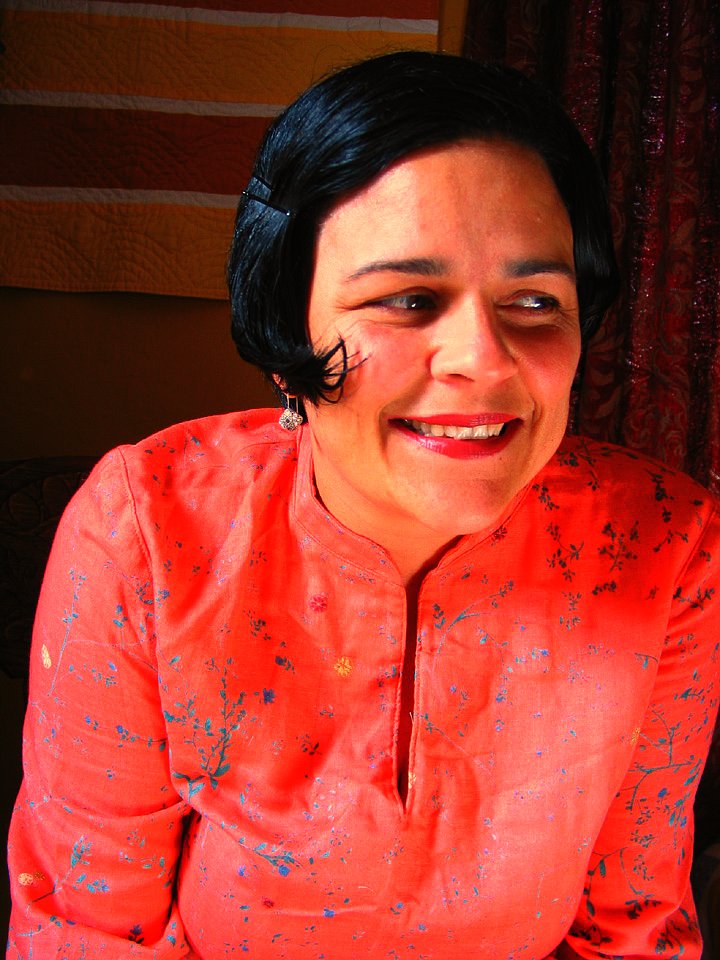
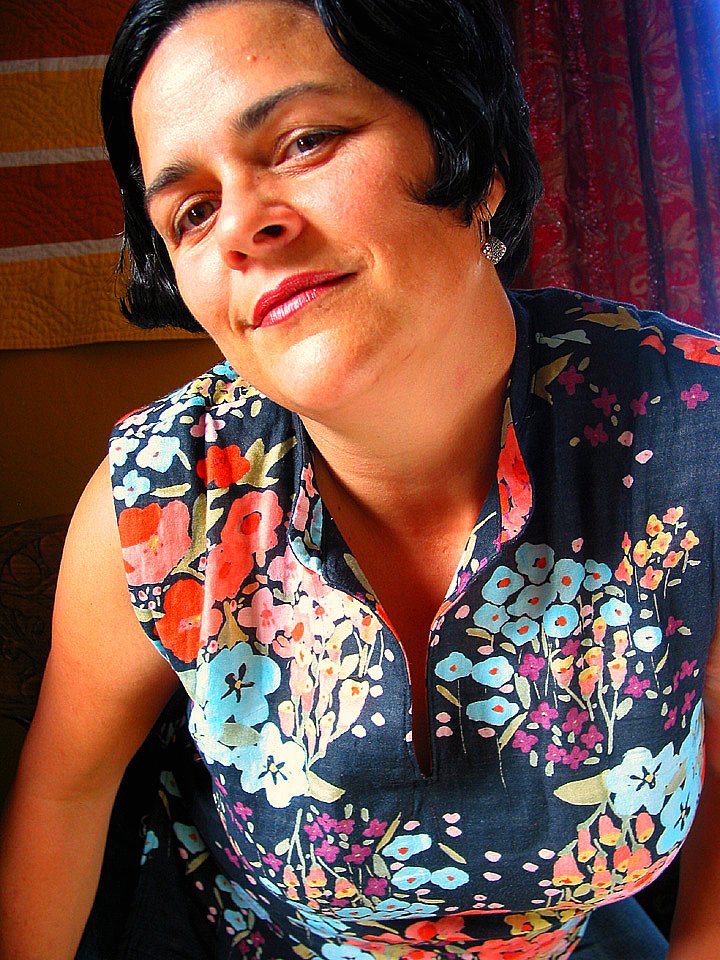
Frustrated with always having to do major adjustments to store-bought patterns — and wanting to copy a specific and deceptively simple-looking child's dress from Mini Boden, but not having a proper dressform — I decided to do a self-draping. It took three labor-intensive drafts (wrapping myself in fabric, pinning, basting, taking apart, making adjustments, and drafting paper patterns) but I'm very happy with the result. It's so fitted and comfortable in the bust that I can imagine making my own non-stretch bras like in the olden days (I've been having boob trouble from underwires). The hardest part of the pattern making process was having to rip out the sewing on the last, well-fitted version, so that I could make the final pattern. Here's a funny, jazz hands picture with me wearing the final dress for Lorimarsha's visit.

Do you own, rent, or live with your parents?
Seven years and two babies later, we're finally moving out of my mom's house (the house I grew up in) and down (30 miles south) to the ranch that used to belong to my husband's grandparents. If you can pull it off, I highly recommend trying the multi-generational household. Imagine the foundation of love, when every day you have your mom, dad, grandma, and auntie available for hugs, as well as help.

Our plans have always been to move to our cabin in the woods when it finally gets a bathroom and a kitchen (still not done). During the ten years we've been remodeling, our family has outgrown the 600 square feet before we ever got to live in it. We'll be looking for a very special person or two to rent it, someone who will love it as much as we do.

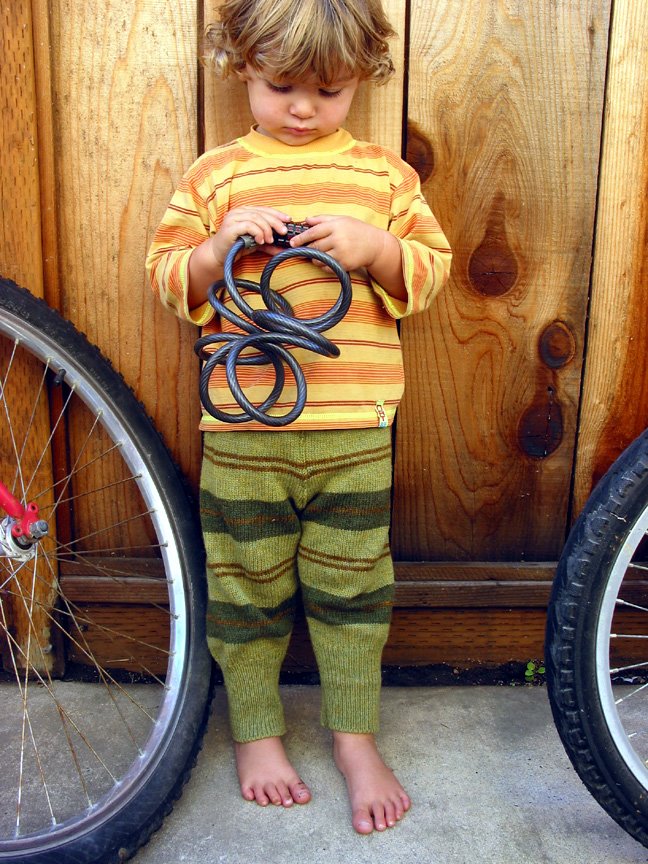
While it will be sad to leave the auntie and grandma, we are looking forward to exploring the ranch's ten acres of coastal scrub, having adventures with horses, cleaning out the greenhouse, learning about animal care, native plants, and bees, and generally having the physical space to match the endless energy of two active boys. I see bike tracks, forts, archery, and lots of general digging and hacking in our future.

We'll be near this awesome place.

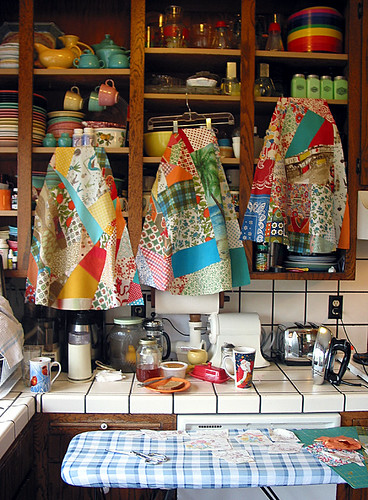
Like I need more fabric.
Next weekend, Susie Bright — famed writer of sexual politics, erotica, feminism, and popular culture, who also just happens to be a fellow craft blogger, dressmaker, and neighbor — is de-stashing! Makes me all hot and bothered just thinking about it.

Labels: , ,

Sunday, May 03, 2009

Me be a princess, Mama?

Fabric store purchase = $70*


Staying up till 2:30 a.m. wrestling with FOE and nylon/spandex fabric = $ At least 30 new gray hairs — perhaps years off my life


Fulfilling birthday boy's only wish (a pink dress) = Priceless

---------------

*Don't worry, I purchased more than just the dress fabric.

Photography and model = My sister

The Chicken's FOE tutorial, which I should have read first.

Labels: ,

Sunday, April 19, 2009

The Patchwork of My (Future) Life

panel_three
I sew in the kitchen. The iron cord really does frequent the butter dish. I hang my works in progress on the curtain rods or tack them to the cupboards. From the counter you can see that we like: toast, preferably from vintage toaster; juice from the Champion (beet and carrot, mostly); two different ways to make coffee. Things you can't really see are: the yellow salt cellar filled with sea salt (I like to add it in pinches) and the "coffee grinder," which actually has ground dried chipotles in it — it's like fairy dust for food. Yum!

patchwork_panel1
I showed a sneak peek at this wip here. It was going to be a full circle skirt, but after holding it up I knew I'd never wear it — it's definitely not flattering to my body type.

patchwork_panel2
After a short-lived idea that it might serve as a heavily-varnished floor mat, my mom's suggestion as a table cloth seemed like, duh, of course it's a table cloth.

patchwork_panel3
While sewing I was thinking about our new, possible/probable home down at The Ranch. It's a long story, hopefully to be told in an interesting way, here, in the future. For now, look closely at the patchwork and you'll be able to get clues about it: the palm tree, the car racing, the fruits and veggies, the animals!

I've got about a half circle done. I find it so satisfying looking through the scraps — some vintage, some contemporary; each tells a story. The finished project is definitely more than the sum of its parts. The serger and rotary cutter made it so easy! The kitchen and meals did suffer during construction, though.

Here's a preview of how it will look as a table covering.

Labels: ,

Monday, April 06, 2009

It was a three skirt weekend.

b_day_skirt
ruffle_purple
I made three skirts this weekend, one for me and two for my sister (see above). She ended up with three skirts for her birthday, though, because I also wrapped up the ruffle skirt (seen previously here). This is the ruffle skirt's debut as a finished piece. One of the skirts I made for her this weekend isn't shown yet because she hasn't taken a pic — it's the same Amy Butler fabric as the one I made for myself. I also made a grey linen tunic for me out of fabric given to me by Sonya. Whew! It was a rockin' sewing binge. Gosh, I love those.

Someday, more interesting prose. For now, this is all I've got.

Labels: ,

Saturday, March 21, 2009

Yellow

skirt_slippers3
The skirt:
I took my self-drafted (shouldn't it be draughted?) A-line skirt pattern from Sew, What, Skirts and turned it into a straight skirt by simply folding the pattern at the hip to make a vertical line from hip to hem instead of the angled "A" shape, then I added three rows of ruffles at the bottom. It's my new favorite skirt. You've already seen the one I made one for my sister.

The slippers:
I love them, too, but I didn't love making them. Most of the Ravelry reviews of the pattern are favorable — I'm not sure why it vexed me, it could be that I have small children distracting me. Why there are no stitch counts for the soles, or, why the step numbers do not correlate to row numbers, are two of my questions about the pattern. Having said that, I think they are totally cute and comfortable and it looks like many people have had success with them.

slippers

Labels: , , , ,

Thursday, March 05, 2009

Three Recent Flickr Favs

A lorimarsha Original
A lorimarsha original. Check out this little video of her atelier.

Galliano
John Galliano Spring '09, via lorimarsha.

For my Sister
My first attempt at serged ruffles — a spring skirt for my sis. It's a WIP. If you look closely you can see the pins.

Check out my other flickr favs here.

What are your inspirations?

Labels: , ,

Friday, November 28, 2008

Glue-Set Zipper Tutorial

[I'm doing a little blog organizing and finally posting this zipper tutorial that I wrote up for Sew, Mama, Sew! last year. Enjoy!]

The Pep Talk

Learning to install a zipper changed my life.

Sewing for myself gives me control of what my clothing looks like and how it fits - how empowering is that! I'm so in love with the process and result of garment making that I've been averaging about two pieces a week. I can make a skirt in a couple of hours! It all started with the book Sew What! Skirts, which was written and packaged in such a way as to tempt me to overcome my fear of the zipper foot.

Around the same time I read a blog post by a woman who had gained ten pounds over the holidays and had made herself a cute new skirt to fit her increased size. This concept rearranged my thinking. No longer was I going to wait to lose weight in order to reward myself with new clothes. I was going to draft a skirt pattern (learned from Sew What! Skirts) to fit my body as-is; choose a fabric that I love; and sew myself some tailored clothes. Custom-fitted clothing looks and feels better than off-the-rack, especially if your body shape doesn't fit the industry standards.

The ruffler foot is not the zipper foot.

I was afraid of sewing in a zipper for about 30 years because I thought my mom's ruffler foot was a zipper foot. A zipper foot is actually just a simple little foot that looks like half of a foot. One side is missing so that you can get close to the zipper teeth without bumping into them. My zipper foot (#4 Bernina) has two positions, left and right, so that you can sew up either side of the zipper. The zipper foot is not complicated and should not scare you away. The lesson here: get to know your sewing attachments, they are your friends. Be sure to read up on your own model of zipper foot.

Don't hate me because I'm a beautiful zipper.

The most difficult part of zipper installation is making it look good. With the glue-set method you eliminate most of the challenges. The process becomes quite easy. The idea behind the glue-set zipper installation is to use adhesive to hold the zipper in place, while sewing, instead of pins. This allows you to top stitch the zipper without having to wrangle with the pins. And, since you are top stitching it into place, you have more control on how it looks on the outside, thus, more chances at zipper success.

The Glue-Set Zipper Tutorial: A basic side zipper for an A-line skirt

Step 1: Rough Zipper Layout


With the front and back panels of the skirt right sides together, lay a zipper on the side seam about 1/4 inch down from the stay stitching to get an idea of where the bottom of the zipper will be. A zipper between seven and nine inches is considered normal for skirts. The shorter the zipper is the harder it will be to get over hips. Got a big back side? Use a longer zipper.

-----------------------------------------

Step 2: Mark Zipper Bottom


Place two pins at the bottom of where the zipper will end. You want these to be about where the zipper teeth end, not where the zipper fabric ends. The goal is to get as close to the zipper as possible without running your sewing machine needle into the zipper teeth or bottom closure. Continue to pin the two skirt pieces together in preparation for sewing.

-----------------------------------------

Step 3: Sew and Baste Zipper Side Seam


Starting at the bottom of the skirt, sew with a regular stitch up to the two pins that mark the bottom of where the zipper will go. At this point back tack a little for reinforcement. Continue to the top of the skirt waist with a basting stitch. These stitches will be ripped out after the zipper is installed. Press the seam flat with an iron.

-----------------------------------------

Step 4: Glue Zipper


With a regular glue stick apply glue to the right side of the zipper avoiding the zipper teeth. I have read that there are sewing adhesives, but have not tried any yet. The glue stick seems to work fine.

-----------------------------------------

Step 5: Rough Zipper Placement


Gently place the glued side of the zipper onto the pressed side seam about 1/4 inch from the stay stitching. This isn't the final placement so do not press it into the fabric.

-----------------------------------------

Step 6: Final Zipper Placement


Starting at the top of the zipper, roll the zipper into place doing your best to center the teeth along the line of the seam.

-----------------------------------------

Step 7: Set Glue


When you are happy with the placement and alignment of your zipper set the glue by pressing with an iron. Make sure it's not too hot.

-----------------------------------------

Step 8: Top Stitching (part 1)


On the right side of the fabric, with zipper foot set to the outside position, sew across the bottom of the zipper. You'll be starting at one corner and sewing across the seam to the other corner of the bottom of the zipper. Stop at this corner, leaving the needle in the fabric. Make sure that you don't hit the bottom closure of the zipper.

-----------------------------------------

Step 9: Top Stitching (part 2)


At the corner of the bottom of the zipper leave the needle in the fabric and lift foot to turn the fabric for the ascent back to the waist. You want the distance from the seam to the stitching to be as far away from the seam as you can go without running off of the zipper fabric. This is one of the challenges of the zipper. If you are too close to the zipper teeth it's harder to make a neat looking stitch. If you get to far away, your stitching falls off of the zipper, which looks bad and messes with functionality. This photo shows the distance that I normally use, I think it's about 3/8 inch from the seam. Make sure to leave the threads long enough to work in when finished.

-----------------------------------------

Step 10: Zipper Pull Work-Around (part 1)


One of the problems with putting in zippers is sewing around the bulk of the zipper pull. It tends to make for wonky stitching up at the top, with the stitching taking on a Y-shape as you sew around the pull. One way to fix this is to make the top stitch far enough away that the pull doesn't affect the stitch. Another trick is to stop short of the pull; leave the needle in the fabric; and pull the zipper down a bit, so it's behind the zipper foot.

-----------------------------------------

Step 11: Zipper Pull Work-Around (part 2)


With needle still in the fabric and the foot up the zipper is opened to move the zipper pull behind zipper foot. Put foot down and continue sewing to the top of the skirt.

-----------------------------------------

Step 12: Move Zipper Foot


Switch zipper foot to right side of the needle.

-----------------------------------------

Step 13: Top Stitch Other Side


Starting in the bottom corner of the top-stitching, place needle in fabric. Lower zipper foot and stitch along the bottom of the zipper following the previous stitches. At the corner leave the needle in the fabric. Lift foot, rotate fabric, put foot down, and top stitch up other side of zipper as before.

-----------------------------------------

Step 14: Check Zipper


After top stitching is done check the underside of the zipper to make sure that you have sewn all away around the zipper without running off of the zipper fabric. I moved the zipper pull up and down according to where I was sewing in order to avoid sewing around it.

-----------------------------------------

Step 15: Rip Out Basting


If you are happy with your top-stitching you are now done with the hard part. If the top stitching looks funky, or the stitches didn't catch the zipper, then you should probably rip out the stitches with a seam ripper and sew it again. This sounds difficult, but it's really not that hard. Once you are satisfied with your work, you get to do the fun part: ripping out the basting to reveal the zipper.

-----------------------------------------

Step 16: Pull Out Threads


Because it's so fun to rip out the basting I took another picture. Don't forget to pull out the little bits of basting thread.

-----------------------------------------

Step 17: Sew in Ends


You should now have a working zipper. If a little glue has gunked up the zipper teeth, just wash it off with a damp rag. The last step in the zipper installation is to work in the threads at the bottom of the zipper. Use a regular hand sewing needle to run the threads to the inside of the skirt, tie off, and clip excess.

-----------------------------------------


This is what my finished skirt looks like. When Kristin asked me to do a tutorial for Skirt Month I immediately thought of the glue-set zipper. As I planned the skirt and the tutorial I realized that I wasn't sure which step to start the zipper tutorial with. I ended up making a start-to-finish photographic tutorial of how I sew an A-line skirt with glue-set zipper. Since it took 47 photos to document the process I'm paring this post down to the zipper-only tutorial — a mere 18 photos. The rest of the skirt tutorial can be found in this Flickr set.

Good luck and happy sewing.
— Michelle

Labels: , ,

Monday, November 10, 2008

Solstice Calendar: A Work-in-Progress

Bill, Sarah, and Percy are the Owl Babies waiting for their mama owl to come home.
Wet-felted, undyed roving with thread, felt, and seed bead details.

For about a year I've been thinking about making a woodland "advent" calendar. I've been wanting to jump into needle-felting and wet-felting — both techniques I have little experience with — and this seemed like a great way to start. I've been envisioning woodland creatures, mushrooms, maybe a few gnomes, tucked away in little "stone" pockets to be pulled out by tiny fingers to attach to their forest home.

Until now my ideas have been fairly abstract — I've known the essence of what I want, but not sure how it would manifest. Last Sunday, on a floor filled with felt and a pair of sharp scissors, I started the process of bringing my idea to life. I'm not sure how long it will take, what the finished piece will look like, or, how it will end up being used. But, I do know that I'd love y'all to follow along. Here we go:

Day 1 (Sunday, Nov. 9th)
As I sat on the floor cutting out felt, I started thinking a little more about what I wanted and the logistics of it all. How will things stick to the felt? Velcro or not? Will they be too heavy? Too fuzzy? Not strong enough to withstand a toddler? Where do I want things to go? How many pockets should it have? What are we celebrating? What am I counting down to? Do the pockets even need numbers? Solstice came to mind. But, unlike Christmas, it falls on a different day each year — and, there are two Solstices to think about. Hmmm? Do I represent winter with snow even though it doesn't really snow here? Should the tree have leaves? How much of it should be movable?

Since this is a work-in-progress, I don't have all the answers. I'm having fun discovering what this project will be as I'm working on it. It's been a long time since I've done a craft without a pattern or book or directions. It's a familiar process, though — it's how I've done things my whole life. My sister and I always had creative freedom — lots of supplies and nobody telling us how it should or shouldn't be (Thanks, mom!). I didn't realize this was such a large part of my creative make up until I started free-hand cutting into the wool felt with no outline or pattern to follow. The process was so familiar. I figured that if I messed up I could get more felt or make something different, maybe end up with a pink tree instead. It's second nature to me now, this knowing that creative mistakes are not to be feared. If only I could apply this to other areas of my life.

----------

It started to shape up, becoming quite large (about 24 inches by 40 inches). At first I thought it would just be the gold background, but it quickly grew with the addition of the green to make room for the pockets. I prematurely cut the top of the tree, had to move the whole thing down and add a piece at the top. I butt-joined it with the faux wood-grain stitching later on.

Detail of stone pockets before I sewed them with the opening on the bottoms. Whoops! I still need to seam rip the tops out of three rows. To get as much color variation as possible I used 100% wool, wool/nylon and some wool/rayon blends. I'm not against using acrylic, but trying to keep it to as much wool as possible so I can needle felt on it if I want.

Machine stitching a faux woodgrain pattern on the tree with my new-to-me, vintage Brother sewing machine. I tried make stitching that is visually interesting. My goal is to have a nice balance of shapes, not realism.

As soon as I cut the hole for the owls to live in, I knew it needed to have some dimension. I added a flange piece by blanket stitching it to the front, then whip stitching it to the background, making sure to go through three layers to tack it all down: the flange, the dark interior, and the golden back piece.

The front doors need to lead somewhere, so another flange is added. That glob of stitching in the foreground is supposed to be a little critter sitting on the tree.

The doors are whip-stitched on the front side and hinged on the inside.

Each child plays differently with it. Little guy, C, likes to rearrange the leaves, big brother, H, likes to take the leaves and put them in the pockets. He also threw them on the ground since it is Fall. "Get it?" he said.

Labels: , , , , , ,

Tuesday, November 04, 2008

Vintage Chick

This is another made-for-Quilt-Market shirt (Simplicity 3835), although it never made the cut at the show because I felt a little too whimsical in it. It's made with what is possibly the best vintage chicken fabric of all time (thanks, Cicely) — though, this fabric is a serious rival. I wore this outfit to our preschool parent/teacher conference today and it got good reception. In my world, at least for me, this is considered "dressed up." Can I tell you how much that pleases me?

$20 target cardigan + home-sewn tunic from gifted, vintage fabric + $25 cords from the camping store + hand-knit hat + my sister's lipstick = "Dressed Up"

Labels: , ,

Monday, November 03, 2008

Nani Iro Tunics Two Ways


Part of my frantic preparation for Quilt Market was to sew as many clothes as possible — I made three shirts, a skirt, and almost a whole coat. Sure, I already have a bunch of home-sewn clothes, but they weren't fresh. I needed something new to make me feel good. So, I cut into my coveted Nani Iro double gauze fabrics and used my trusty Simplicity 5197 (Ack! It doesn't show up at Simplicity. It might be out of print.) pattern.

Photos and poses are inspired by my sister and her fashion-y flickr friends.

Labels: , ,

Wednesday, October 01, 2008

Sweater Sleeve Kid Pants Tutorial

This is not fine sewing — you'll want to skip this post if your inner perfectionist screams at the idea of "winging it." This is a fun and funky tutorial to help you make a pair of kids pants out of the sleeves of a wool sweater. I used a pair of 18-mos-sized sweatpants as a pattern, and adjusted for length to fit my tall 2-1/2-year-old. The sweater I used is at least an adult XL with long, raglan sleeves. To see the other pants that I made with sweater sleeves, see my original post here.

What you will need:
  • A 100% wool sweater, adult-size (Large, XL or beyond)

  • A pair of kid pants that have a rise that fits the child recipient (you can add length if you have enough sweater)

  • Enough 1/2-inch elastic to wrap around the child's waist, plus a little extra (you could use other elastic widths, just make sure to adjust the waistband accordingly)

Step 1: Gather your materials
Start with a Large or XL, 100% wool, adult-sized sweater. The bigger the better, because you never know how much it will shrink when you "felt" it.

Step 2: Cut out your pattern
Cut along the inseam of the pants that will become the pattern. This photo looks like I cut through both layers together, but I didn't. If you look at the back of the pants, you can see I started on the other side and worked my way around. I used size 18 mos. sweatpants, because I knew that the inseam fits my two-and-a-half-year-old, and that I could add length.

Step 3: Get your fabric ready
Wash and dry the wool sweater to "felt" it. Cut the sleeves off sweater at the seams. I washed and dried this wool sweater in hot water with soap a few times before deciding to cut into it. I could have "felted" it more, but I figure it's fine as is.

Step 4: Layout your pattern (part 1)
With inseam and sleeve seam on the same side, lay the "pattern" over the "fabric."

Step 5: Layout your pattern (part 2)
Make sure the you have enough width at the top by stretching out the elastic. Move the pattern up or down till you get enough width for the waist (plus a small seam allowance) as well as the right length at the bottom.

Step 6: Cut inseam
Following the curve of the sweat pants inseam, cut the sweater to match. On these sweats, the inseam has the same curve for the front and back. The only difference is the rise is shorter in the front, longer in the back.

Step 7: Rough cut the waist
Follow the curve of the highest part of the waist (the back) and leave an extra inch or so for turning to make the casing for the elastic.

Step 8: Trim the front rise (part 1)
With inseams up, place the pant leg on top of the sweater in preparation for trimming the waist. See how the rise is lower in the front.

Step 9: Trim the front rise (part 2)
Leaving about an inch allowance for the casing for the elastic, and following the curve of the waist, trim off the excess waist in the front of the pants (see orange line in step 8).

Step 10: Rough cut second leg
With inseams on the same side, lay the first leg/sleeve on the second sleeve to use as a pattern. Cut rise and waist.

Step 11: Trim waist/front rise of second leg
Make sure that you flip the second leg over, so that inseams are where they should be — on the inside. You are making mirror copies of the legs, a right and a left leg. You don't want two of the same leg. Match up the crotch and the waists, then trim the front waist/rise of the second leg. I ended up trimming a bit of the back because it curved up to a point. You want it to be fairly straight across the back.

Step 12: Prepare for sewing
Turn one leg wrong-side out, then insert the other leg so that the right-sides are together and the inseams match up.

Step 13: Pin together
With inseams (and stripes if you have them) matched up, pin legs together. Make sure the waist and rise match. One of my legs had some excess at the back rise, so I trimmed it off.

Step 14: Sew inseam
With a zigzag stitch, sew along inseam, removing pins before you get to them. Sew inseam twice. To get the knit fabric to go through my machine smoothly, I pulled a little on the back of it as I was sewing.

Step 15: Top-stitch inseam (optional)
On the right-side top-stitch next to the inseam to help the seam lie flat on the inside. You can skip this step.

Step 16: Turn waist edge (optional)
Turn the top edge of the waist to the inside, about a quarter of an inch, and sew down with a zigzag stitch. Alternately, you could just run a zigzag around the top edge without turning in down. This might be a better option, since the turning adds bulk around the waist.

Step 17: Make casing
After finishing the edge of the waist, fold over the waist about an inch and pin. Starting at the back of the pants, sew a zigzag stitch around the pants waist, stopping a couple inches before completing the circle. You need to leave an opening to run the elastic though.

Step 18: Add the elastic
Attach a safety pin to the end of the elastic and run it through the casing, making sure to not twist it. Keep holding the other end of the elastic so you don't lose it inside the casing. Safety pin the elastic ends together and try pants on the recipient. I skipped this step and the next, and had to undo a bunch of stitches to make adjustments to the elastic.

Step 19: Sew the elastic together
After the elastic is properly sized, pull it through the opening in the casing and run some zigzag stitches along it to close the loop.

Step 20: Close the casing
After making sure the elastic fits properly, sew up the remaining casing. You're done!

Step 21: Bribe child to take photo
Let child watch video so you can take a no-flash photo that's less blurry. Ignore slightly wonky inseam, and enjoy!

Step 22: Bike ride
Make up for video watching with bike ride and outdoor photo shoot. Much better.

Larger photos can be found over at the flickr set.

------------

Trivia tidbit: My photo of the original recycled sweater pants appears in wee form in the book Knitalong by Larissa Brown and Martin John Brown.

Labels: , , , ,