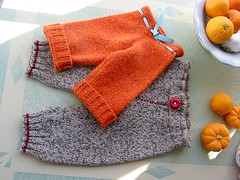
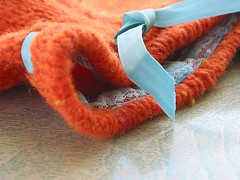
Sweater Sleeve Kid Pants Tutorial
This is not fine sewing — you'll want to skip this post if your inner perfectionist screams at the idea of "winging it." This is a fun and funky tutorial to help you make a pair of kids pants out of the sleeves of a wool sweater. I used a pair of 18-mos-sized sweatpants as a pattern, and adjusted for length to fit my tall 2-1/2-year-old. The sweater I used is at least an adult XL with long, raglan sleeves. To see the other pants that I made with sweater sleeves, see my original post here.
What you will need:
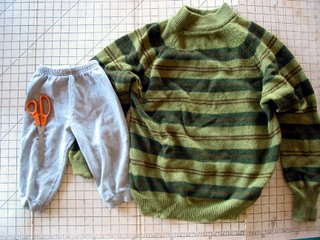 Step 1: Gather your materials
Start with a Large or XL, 100% wool, adult-sized sweater. The bigger the better, because you never know how much it will shrink when you "felt" it.
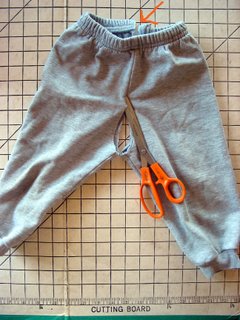 Step 2: Cut out your pattern
Cut along the inseam of the pants that will become the pattern. This photo looks like I cut through both layers together, but I didn't. If you look at the back of the pants, you can see I started on the other side and worked my way around. I used size 18 mos. sweatpants, because I knew that the inseam fits my two-and-a-half-year-old, and that I could add length.
 Step 3: Get your fabric ready
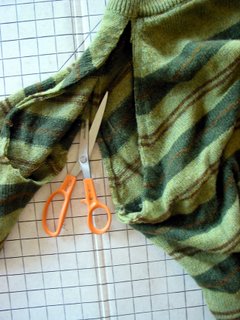
Wash and dry the wool sweater to "felt" it. Cut the sleeves off sweater at the seams. I washed and dried this wool sweater in hot water with soap a few times before deciding to cut into it. I could have "felted" it more, but I figure it's fine as is.
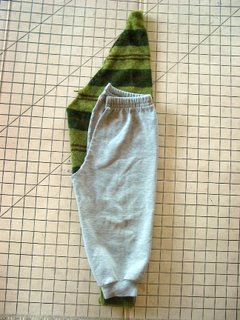 Step 4: Layout your pattern (part 1)
With inseam and sleeve seam on the same side, lay the "pattern" over the "fabric."
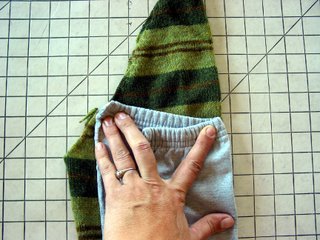 Step 5: Layout your pattern (part 2)
Make sure the you have enough width at the top by stretching out the elastic. Move the pattern up or down till you get enough width for the waist (plus a small seam allowance) as well as the right length at the bottom.
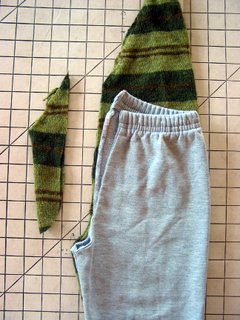 Step 6: Cut inseam
Following the curve of the sweat pants inseam, cut the sweater to match. On these sweats, the inseam has the same curve for the front and back. The only difference is the rise is shorter in the front, longer in the back.
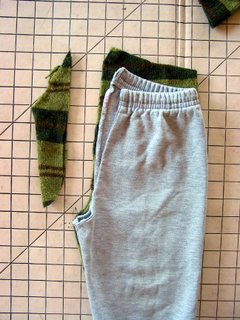 Step 7: Rough cut the waist
Follow the curve of the highest part of the waist (the back) and leave an extra inch or so for turning to make the casing for the elastic.
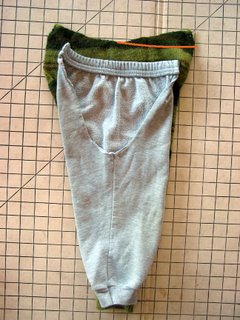 Step 8: Trim the front rise (part 1)
With inseams up, place the pant leg on top of the sweater in preparation for trimming the waist. See how the rise is lower in the front.
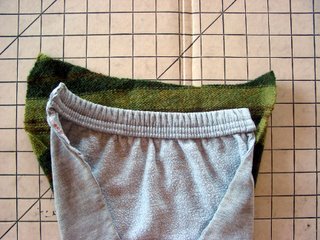 Step 9: Trim the front rise (part 2)
Leaving about an inch allowance for the casing for the elastic, and following the curve of the waist, trim off the excess waist in the front of the pants (see orange line in step 8).
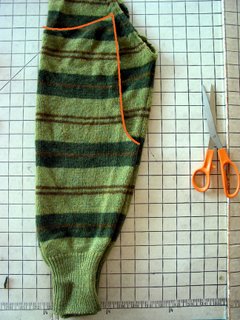 Step 10: Rough cut second leg
With inseams on the same side, lay the first leg/sleeve on the second sleeve to use as a pattern. Cut rise and waist.
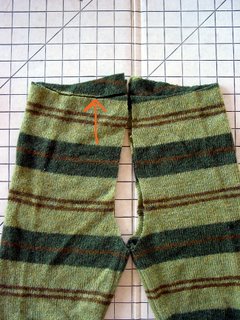 Step 11: Trim waist/front rise of second leg
Make sure that you flip the second leg over, so that inseams are where they should be — on the inside. You are making mirror copies of the legs, a right and a left leg. You don't want two of the same leg. Match up the crotch and the waists, then trim the front waist/rise of the second leg. I ended up trimming a bit of the back because it curved up to a point. You want it to be fairly straight across the back.
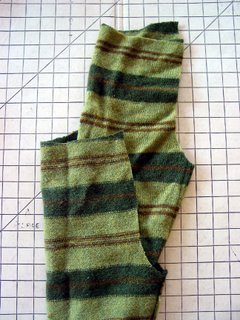 Step 12: Prepare for sewing
Turn one leg wrong-side out, then insert the other leg so that the right-sides are together and the inseams match up.
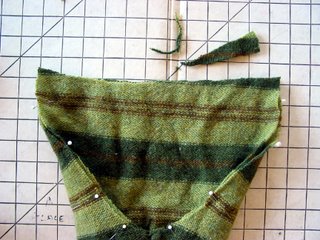 Step 13: Pin together
With inseams (and stripes if you have them) matched up, pin legs together. Make sure the waist and rise match. One of my legs had some excess at the back rise, so I trimmed it off.
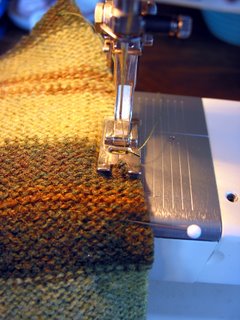 Step 14: Sew inseam
With a zigzag stitch, sew along inseam, removing pins before you get to them. Sew inseam twice. To get the knit fabric to go through my machine smoothly, I pulled a little on the back of it as I was sewing.
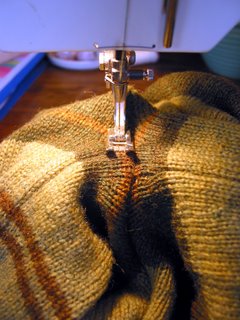 Step 15: Top-stitch inseam (optional)
On the right-side top-stitch next to the inseam to help the seam lie flat on the inside. You can skip this step.
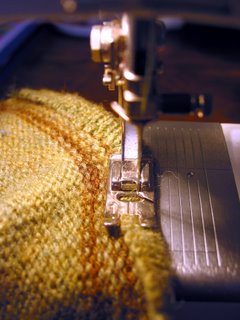 Step 16: Turn waist edge (optional)
Turn the top edge of the waist to the inside, about a quarter of an inch, and sew down with a zigzag stitch. Alternately, you could just run a zigzag around the top edge without turning in down. This might be a better option, since the turning adds bulk around the waist.
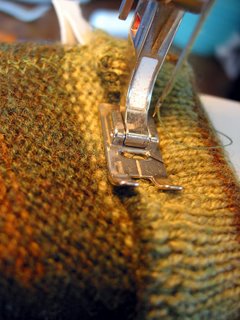 Step 17: Make casing
After finishing the edge of the waist, fold over the waist about an inch and pin. Starting at the back of the pants, sew a zigzag stitch around the pants waist, stopping a couple inches before completing the circle. You need to leave an opening to run the elastic though.
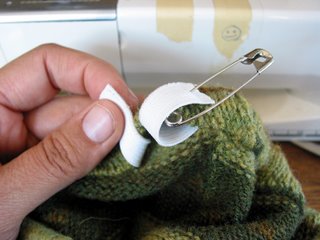 Step 18: Add the elastic
Attach a safety pin to the end of the elastic and run it through the casing, making sure to not twist it. Keep holding the other end of the elastic so you don't lose it inside the casing. Safety pin the elastic ends together and try pants on the recipient. I skipped this step and the next, and had to undo a bunch of stitches to make adjustments to the elastic.
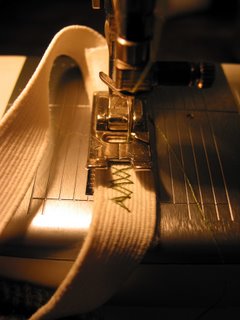 Step 19: Sew the elastic together
After the elastic is properly sized, pull it through the opening in the casing and run some zigzag stitches along it to close the loop.
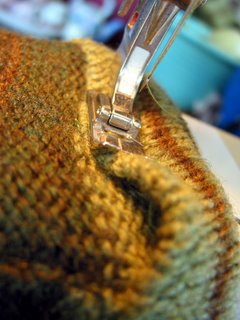 Step 20: Close the casing
After making sure the elastic fits properly, sew up the remaining casing. You're done!
 Step 21: Bribe child to take photo
Let child watch video so you can take a no-flash photo that's less blurry. Ignore slightly wonky inseam, and enjoy!
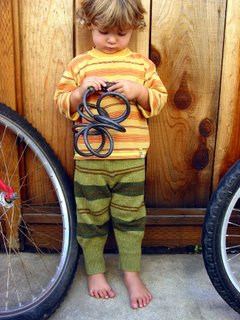 Step 22: Bike ride
Make up for video watching with bike ride and outdoor photo shoot. Much better.
Larger photos can be found over at the flickr set.
------------
Trivia tidbit: My photo of the original recycled sweater pants appears in wee form in the book Knitalong by Larissa Brown and Martin John Brown.
What you will need:
- A 100% wool sweater, adult-size (Large, XL or beyond)
- A pair of kid pants that have a rise that fits the child recipient (you can add length if you have enough sweater)
- Enough 1/2-inch elastic to wrap around the child's waist, plus a little extra (you could use other elastic widths, just make sure to adjust the waistband accordingly)
 Step 1: Gather your materials
Start with a Large or XL, 100% wool, adult-sized sweater. The bigger the better, because you never know how much it will shrink when you "felt" it.
 Step 2: Cut out your pattern
Cut along the inseam of the pants that will become the pattern. This photo looks like I cut through both layers together, but I didn't. If you look at the back of the pants, you can see I started on the other side and worked my way around. I used size 18 mos. sweatpants, because I knew that the inseam fits my two-and-a-half-year-old, and that I could add length.
 Step 3: Get your fabric ready
Wash and dry the wool sweater to "felt" it. Cut the sleeves off sweater at the seams. I washed and dried this wool sweater in hot water with soap a few times before deciding to cut into it. I could have "felted" it more, but I figure it's fine as is.
 Step 4: Layout your pattern (part 1)
With inseam and sleeve seam on the same side, lay the "pattern" over the "fabric."
 Step 5: Layout your pattern (part 2)
Make sure the you have enough width at the top by stretching out the elastic. Move the pattern up or down till you get enough width for the waist (plus a small seam allowance) as well as the right length at the bottom.
 Step 6: Cut inseam
Following the curve of the sweat pants inseam, cut the sweater to match. On these sweats, the inseam has the same curve for the front and back. The only difference is the rise is shorter in the front, longer in the back.
 Step 7: Rough cut the waist
Follow the curve of the highest part of the waist (the back) and leave an extra inch or so for turning to make the casing for the elastic.
 Step 8: Trim the front rise (part 1)
With inseams up, place the pant leg on top of the sweater in preparation for trimming the waist. See how the rise is lower in the front.
 Step 9: Trim the front rise (part 2)
Leaving about an inch allowance for the casing for the elastic, and following the curve of the waist, trim off the excess waist in the front of the pants (see orange line in step 8).
 Step 10: Rough cut second leg
With inseams on the same side, lay the first leg/sleeve on the second sleeve to use as a pattern. Cut rise and waist.
 Step 11: Trim waist/front rise of second leg
Make sure that you flip the second leg over, so that inseams are where they should be — on the inside. You are making mirror copies of the legs, a right and a left leg. You don't want two of the same leg. Match up the crotch and the waists, then trim the front waist/rise of the second leg. I ended up trimming a bit of the back because it curved up to a point. You want it to be fairly straight across the back.
 Step 12: Prepare for sewing
Turn one leg wrong-side out, then insert the other leg so that the right-sides are together and the inseams match up.
 Step 13: Pin together
With inseams (and stripes if you have them) matched up, pin legs together. Make sure the waist and rise match. One of my legs had some excess at the back rise, so I trimmed it off.
 Step 14: Sew inseam
With a zigzag stitch, sew along inseam, removing pins before you get to them. Sew inseam twice. To get the knit fabric to go through my machine smoothly, I pulled a little on the back of it as I was sewing.
 Step 15: Top-stitch inseam (optional)
On the right-side top-stitch next to the inseam to help the seam lie flat on the inside. You can skip this step.
 Step 16: Turn waist edge (optional)
Turn the top edge of the waist to the inside, about a quarter of an inch, and sew down with a zigzag stitch. Alternately, you could just run a zigzag around the top edge without turning in down. This might be a better option, since the turning adds bulk around the waist.
 Step 17: Make casing
After finishing the edge of the waist, fold over the waist about an inch and pin. Starting at the back of the pants, sew a zigzag stitch around the pants waist, stopping a couple inches before completing the circle. You need to leave an opening to run the elastic though.
 Step 18: Add the elastic
Attach a safety pin to the end of the elastic and run it through the casing, making sure to not twist it. Keep holding the other end of the elastic so you don't lose it inside the casing. Safety pin the elastic ends together and try pants on the recipient. I skipped this step and the next, and had to undo a bunch of stitches to make adjustments to the elastic.
 Step 19: Sew the elastic together
After the elastic is properly sized, pull it through the opening in the casing and run some zigzag stitches along it to close the loop.
 Step 20: Close the casing
After making sure the elastic fits properly, sew up the remaining casing. You're done!
 Step 21: Bribe child to take photo
Let child watch video so you can take a no-flash photo that's less blurry. Ignore slightly wonky inseam, and enjoy!
 Step 22: Bike ride
Make up for video watching with bike ride and outdoor photo shoot. Much better.
Larger photos can be found over at the flickr set.
------------
Trivia tidbit: My photo of the original recycled sweater pants appears in wee form in the book Knitalong by Larissa Brown and Martin John Brown.
Labels: felt, kids clothes, recycle, sewing, tutorial

